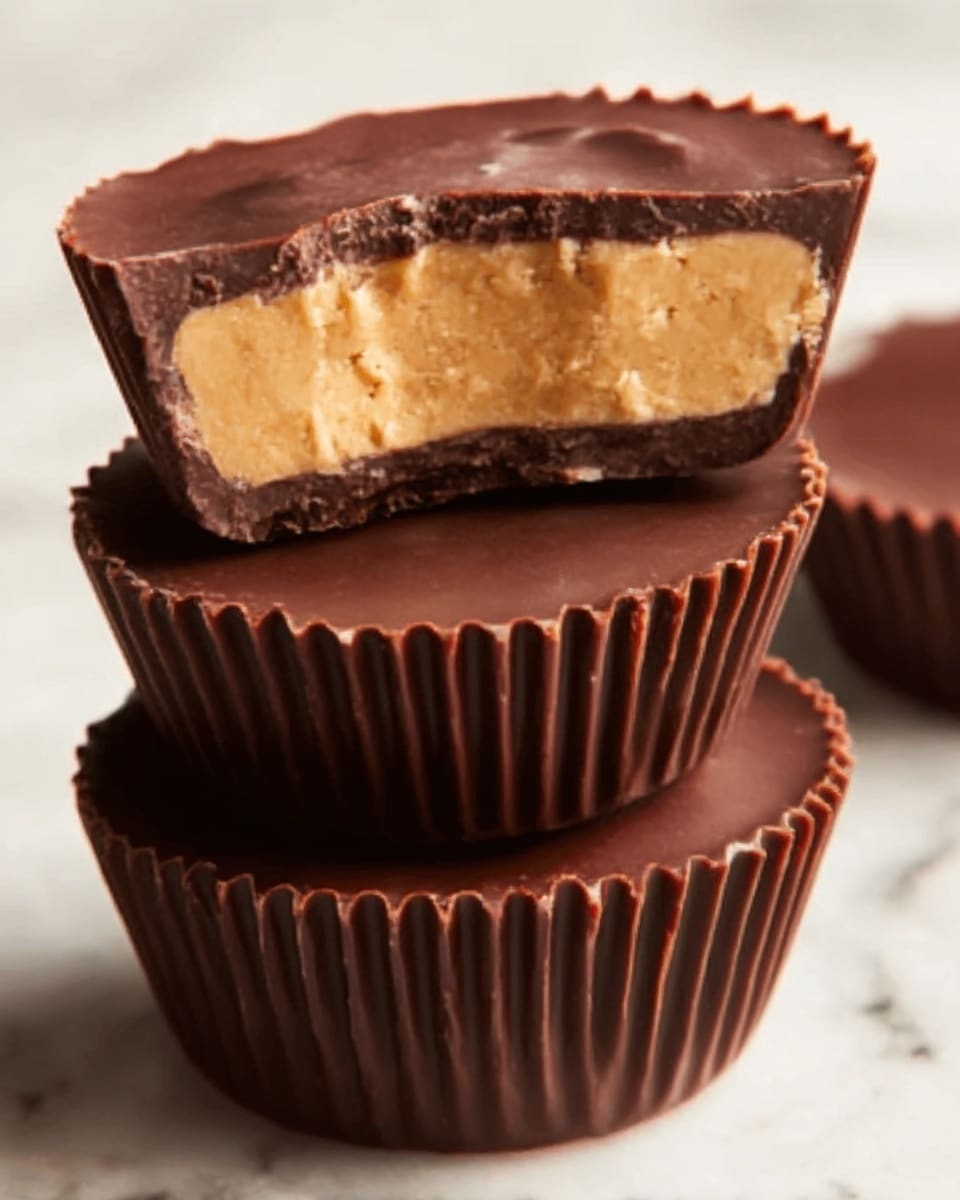
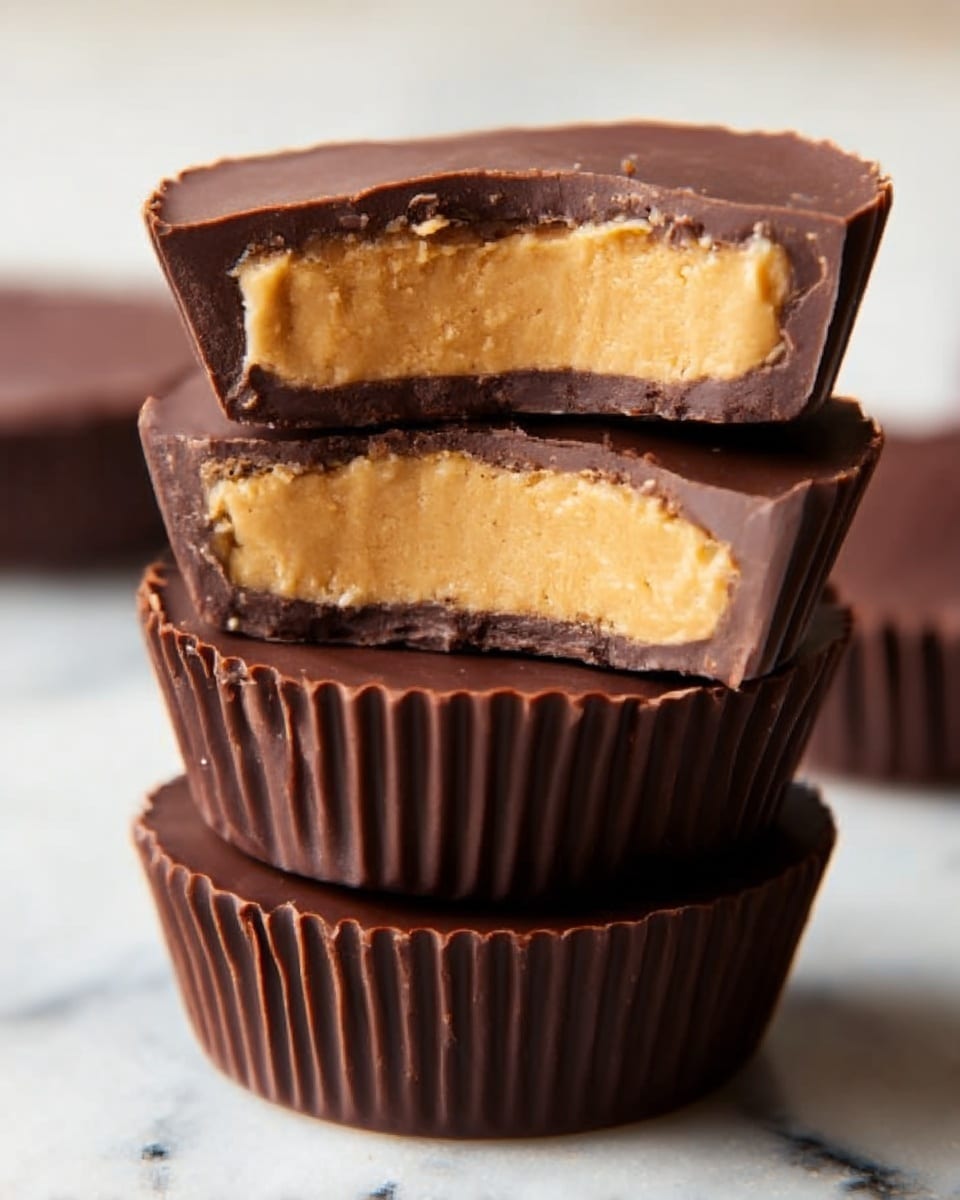
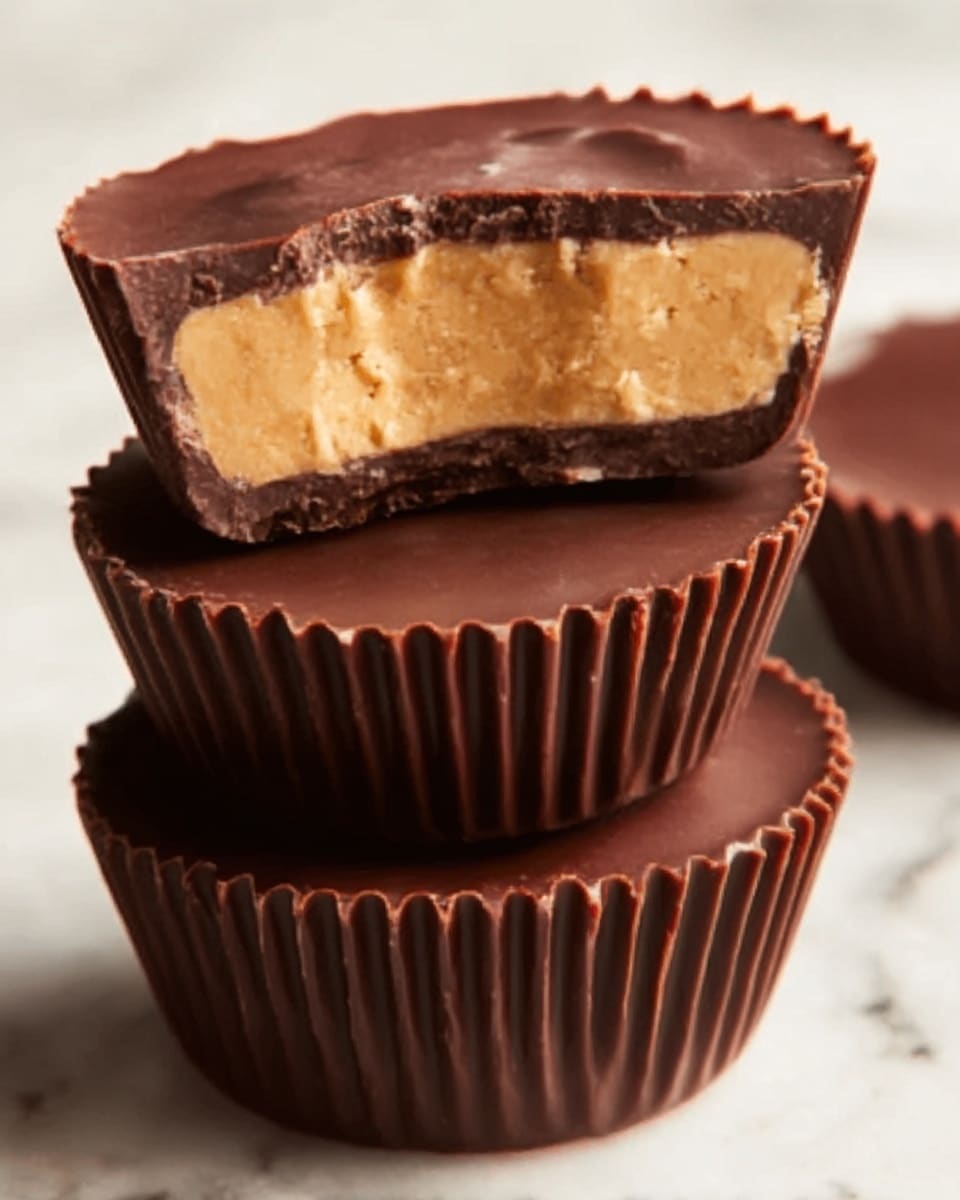
If you have a sweet tooth but also want a little boost of energy and nutrition, this Protein Peanut Butter Cups Recipe is an absolute game-changer. These little treats combine the rich, comforting flavor of creamy peanut butter with decadent semi-sweet chocolate, while the addition of vanilla protein powder turns them into a satisfying snack that fuels your body. They’re perfect for when you crave something indulgent but also want to feel good about what you’re eating. Plus, making them at home means you control every ingredient—no preservatives or hidden sugars, just pure, delicious goodness.
Ingredients You’ll Need
Gathering the right ingredients is the first step toward making these peanut butter cups irresistible. Each item plays a crucial role, from the smooth chocolate that melts on your tongue to the protein-packed peanut butter filling that adds substance.
- Semi-sweet chocolate chips: Use high-quality chocolate for a perfectly balanced sweetness and smooth texture.
- Coconut oil (solid): This helps melt and soften the chocolate for a glossy finish and richness.
- Vanilla extract: Adds a warm, aromatic depth that elevates the overall flavor profile.
- Natural creamy peanut butter: Choose one with just peanuts and salt for a clean, classic peanut butter taste.
- Pure maple syrup: A natural sweetener that enhances the peanut butter’s nuttiness without overpowering it.
- Vanilla protein powder: Boosts the protein content and infuses subtle vanilla notes, making these cups more than just a treat.
- Salt: A pinch balances the sweetness and intensifies the chocolate and peanut butter flavors.
- Parchment paper muffin liners: Essential for easy removal and neat presentation of each cup.
How to Make Protein Peanut Butter Cups Recipe
Step 1: Prepare the Muffin Tin
Start by lining your muffin tin with parchment paper muffin liners. This simple step prevents the peanut butter cups from sticking and keeps their edges clean, making them easier to pop out when they’re ready to enjoy.
Step 2: Melt the Chocolate
Combine the semi-sweet chocolate chips and solid coconut oil in a microwave-safe bowl. Heat in 30-second intervals, stirring well after each to ensure the chocolate melts evenly and smooths out beautifully. Stir in vanilla extract last to keep that lovely aroma fresh.
Step 3: Create Chocolate Base Layers
Pour about one heaping teaspoon of melted chocolate into each muffin liner and gently spread it to cover the bottom surface in an even, thin layer. This chocolate base acts as a firm foundation for the peanut butter filling and helps hold everything together.
Step 4: Chill the Chocolate
Place the muffin tin into the refrigerator to let the chocolate set firmly. This chilling step is crucial as it ensures the base won’t mix with the peanut butter filling later on.
Step 5: Make the Peanut Butter Filling
Warm the peanut butter in the microwave for about 15 to 20 seconds until it’s runny and easier to mix. Then stir in the vanilla protein powder, salt, and maple syrup. Mix until you have a creamy, uniform filling that’s loaded with protein and flavor.
Step 6: Assemble Peanut Butter Discs
Divide the peanut butter mixture into 12 small portions. Shape each portion by hand into discs that are just a bit smaller than the muffin liners; this ensures they fit perfectly on top of the chilled chocolate base.
Step 7: Add Filling to Cups
Take the muffin tin out of the fridge and gently place one peanut butter disc on top of the chocolate base in each liner. This layering will give you that classic peanut butter cup look with a satisfying bite.
Step 8: Add Remaining Chocolate
If the remaining chocolate hardens, warm it briefly in the microwave to get it flowing again. Drizzle or spoon this chocolate over each peanut butter disc, smoothing it all the way to the edges. This last chocolate layer seals the filling inside, locking in the creamy peanut butter taste.
Step 9: Chill Until Set
Pop the muffin tin back into the refrigerator for at least one hour. This chilling time is key to letting the peanut butter cups firm up perfectly so they’re easy to handle and deliciously rich.
Step 10: Serve and Store
Once set, these protein-packed peanut butter cups are ready to enjoy! You can eat them right away or keep them fresh by storing leftovers in an airtight container in the fridge or freezer for convenient future snacking.
How to Serve Protein Peanut Butter Cups Recipe
Garnishes
Sprinkle a pinch of flaky sea salt or a few chopped roasted peanuts on top before serving to add a delightful crunch and a pop of salty contrast to the sweet richness. You could also dust lightly with cocoa powder for an elegant touch.
Side Dishes
This Protein Peanut Butter Cups Recipe pairs wonderfully with a hot cup of coffee or tea, making it a perfect afternoon pick-me-up. For a refreshing balance, serve alongside sliced fresh fruit like strawberries or banana slices.
Creative Ways to Present
Present these peanut butter cups in mini cupcake liners or neatly arranged on a decorative plate with fresh mint leaves for a pretty party platter. Wrapping individual cups in parchment or wax paper squares makes them perfect for gifting or packing as on-the-go snacks.
Make Ahead and Storage
Storing Leftovers
Keep any leftover peanut butter cups in an airtight container in the refrigerator. They stay fresh for about one week, retaining their perfect texture and flavor so you can enjoy them whenever a craving strikes.
Freezing
To store longer, freeze the peanut butter cups in a sealed container or wrapped tightly in parchment and foil. Frozen, they’ll last up to three months. Just thaw briefly on the counter or in the fridge before enjoying.
Reheating
If you like your peanut butter cups a little melty, warm them gently in the microwave for 10 to 15 seconds. Be careful not to overheat, as this can cause the chocolate to lose its smooth texture.
FAQs
Can I use a different type of nut butter?
Absolutely! Almond butter or cashew butter work well too, but keep in mind the flavor and texture will differ slightly. Natural, creamy nut butters with minimal ingredients give the best results.
Can I make these vegan or dairy-free?
Yes! Use dairy-free chocolate chips and ensure your protein powder is plant-based. Coconut oil is already vegan, making this recipe quite adaptable for various dietary needs.
What protein powder works best?
A vanilla-flavored whey or plant-based protein powder with a smooth texture works best to blend evenly into the peanut butter and add that subtle sweetness.
How long do these peanut butter cups last?
Stored in the fridge, they remain fresh for about one week. If frozen, they can last up to three months without losing quality.
Can I make a larger batch at once?
Yes, just double or triple the ingredient amounts and use multiple muffin tins or work in batches. The process remains the same, making it easy to prepare in advance for gatherings or meal prep.
Final Thoughts
I hope you’re just as excited as I am to try this Protein Peanut Butter Cups Recipe. It’s a wonderful way to enjoy a timeless treat that’s deliciously satisfying and packs a bit of wholesome protein. Whether you’re looking for a post-workout snack or a healthier dessert option, these cups hit all the right notes. Get ready to fall in love with your new favorite homemade indulgence!
Print
Protein Peanut Butter Cups Recipe
- Total Time: 1 hour 20 minutes (includes chilling time)
- Yield: 12 servings 1x
- Diet: Low Fat
Description
These Protein Peanut Butter Cups are a delicious and satisfying treat combining rich semi-sweet chocolate with a creamy, protein-packed peanut butter filling. Perfect for a post-workout snack or a healthier dessert option, these cups are made with natural ingredients and sweetened with pure maple syrup for a touch of natural sweetness.
Ingredients
Chocolate Layer
- 12 oz semi-sweet chocolate chips
- 1 teaspoon coconut oil (solid)
- 1/4 teaspoon vanilla extract
Peanut Butter Filling
- 1/4 cup natural creamy peanut butter (ingredients: peanuts + salt only)
- 2 tablespoons pure maple syrup
- 1/3 cup vanilla protein powder
- 1/4 teaspoon salt
Instructions
- Prepare the Muffin Tin: Line a muffin tin with parchment paper muffin liners to prevent sticking and make removal easier later.
- Melt the Chocolate: In a microwave-safe bowl, combine the chocolate chips and solid coconut oil. Microwave in 30-second intervals, stirring between each, until the mixture is completely melted and smooth. Stir in the vanilla extract after melting.
- Create Chocolate Base Layers: Pour about 1 heaping teaspoon of melted chocolate into each liner, spreading it evenly to the edges to form a flat base layer.
- Chill the Chocolate: Place the muffin tin in the refrigerator to let the chocolate base set while preparing the filling.
- Make the Peanut Butter Filling: Heat the peanut butter in the microwave for 15-20 seconds until runny. Stir in the vanilla protein powder, salt, and maple syrup until the mixture is smooth and fully combined.
- Assemble Peanut Butter Discs: Divide the peanut butter mixture into 12 equal portions, shaping each into a disc slightly smaller than the muffin liners for easy layering.
- Add Filling to Cups: Remove the muffin tin from the refrigerator and place one peanut butter disc on top of each chocolate base layer.
- Add Remaining Chocolate: If the melted chocolate has thickened, microwave for 15-20 seconds to loosen it. Drizzle the remaining chocolate over each peanut butter disc, smoothing it out evenly to seal the filling.
- Chill Until Set: Return the muffin tin to the refrigerator for at least one hour to allow the peanut butter cups to fully set and firm up.
- Serve and Store: Enjoy the peanut butter cups immediately, or store leftovers in an airtight container in the refrigerator or freezer for later snacking.
Notes
- Use natural creamy peanut butter with only peanuts and salt for best flavor and texture.
- Ensure the peanut butter filling is slightly smaller than the muffin liner so the chocolate can fully cover and seal the cups.
- Adjust sweetness by adding more or less maple syrup to taste.
- For even melting, stir the chocolate thoroughly between microwave intervals to prevent burning.
- Store in the refrigerator for up to 1 week or freeze for longer storage.
