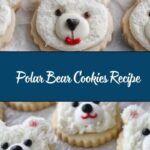
If you have a soft spot for adorable, whimsical treats that taste as delightful as they look, then you are going to fall head over heels for this Polar Bear Cookies Recipe. These charming cookies feature a tender, buttery base enriched with cream cheese, making every bite irresistibly soft and flavorful. Decorated with a snowy white frosting and cute little faces that bring these playful polar bears to life, this recipe is perfect for sharing smiles at any gathering or simply brightening a chilly afternoon. The Polar Bear Cookies Recipe combines simplicity and creative fun in one unforgettable experience.
Ingredients You’ll Need
Gathering these ingredients is a breeze, but each one plays a crucial role in building the flavor, texture, and charm of your cookies. From the creamy butter and cream cheese that give tenderness, to the powdered sugar frosting that adds the perfect sweet finish, every component works together beautifully.
- 3/4 cup (170g) unsalted butter, room temperature: This gives the dough its rich, tender crumb, helping the cookies stay soft.
- 1/2 cup (113g) cream cheese, room temperature: Adds a subtle tang and extra softness to the dough.
- 1 cup (200g) granulated sugar: Essential for sweetness and texture.
- 1 large egg, room temperature: Binds the ingredients and adds structure.
- 1 teaspoon vanilla extract: Provides warm, comforting flavor that elevates the cookies.
- 1/2 teaspoon almond extract (optional): Introduces a delicate nutty note that pairs beautifully with vanilla.
- 3 cups (375g) all-purpose flour: Gives body to the cookie dough and a soft bite.
- 2 teaspoons cornstarch: Keeps the cookies tender and slightly cakey.
- 1/2 teaspoon baking powder: Adds just enough lift for a light texture.
- 1/2 teaspoon salt: Balances sweetness and enhances flavor.
- 1/2 cup (113g) unsalted butter, room temperature (for frosting): Creates smooth, creamy buttercream frosting.
- 2 cups (250g) powdered sugar: Sweetens the frosting and adds a delicate texture.
- 1 teaspoon vanilla extract (for frosting): Intensifies the buttercream’s warmth and aroma.
- 2 tablespoons heavy cream or milk: Makes the frosting luscious and easy to spread.
- Pinch of salt (for frosting): Balances sweetness in the frosting perfectly.
- White sanding sugar or granulated sugar: Adds a snowy sparkle to the frosting’s finish.
- Large chocolate chips (for noses): Perfectly sized details to give the polar bears character.
- Black round sprinkles (for eyes): Small touches that bring the faces to life with adorable expressions.
- Red or pink round sprinkles (for inner ears): Adds a playful pop of color and personality.
How to Make Polar Bear Cookies Recipe
Step 1: Prepare the Cookie Dough
Start by creaming together the butter, cream cheese, and granulated sugar until the mixture is light and fluffy. This step is key because it incorporates air, giving the cookies a wonderfully tender texture. Next, mix in the egg along with vanilla and almond extracts, if using, to infuse the dough with warm, inviting flavors. In a separate bowl, whisk the flour, cornstarch, baking powder, and salt to evenly distribute these dry ingredients and ensure your cookies bake evenly. Gradually blend the dry mixture into the wet ingredients, forming a soft dough that’s ready to chill and firm up.
Step 2: Chill the Dough
Divide your dough into manageable portions, flatten them into discs, wrap in plastic wrap, and pop them into the fridge for at least two hours, or if you’re short on time, freeze for 30 minutes. This chilling process is critical; it firms up the dough, making it easier to roll out and cut while also helping the cookies hold their shape in the oven.
Step 3: Roll and Cut the Cookies
Preheat your oven to 350°F (175°C) and line your baking sheets with parchment paper to prevent sticking. On a lightly floured surface, roll your chilled dough to about 1/3 inch thickness. Using a 2 1/2-inch round cutter, cut out the main faces of the polar bears. For the ears, use a smaller 3/4-inch cutter and carefully trim a flat edge so you can attach them neatly on top of each face. Gently press the ears into place, then chill the assembled cookies in the fridge for 15 minutes to help them set up for baking.
Step 4: Bake the Cookies
Bake the cookies for 10 to 13 minutes or until the edges just begin to set without browning—this is what keeps them tender and soft. After baking, let the cookies cool on the baking sheet for about 15 minutes before transferring them to a wire rack to cool completely. Cooling fully is essential to prevent the frosting from melting during decoration.
Step 5: Prepare the Buttercream Frosting
While the cookies cool, whip up the luscious buttercream by beating butter until creamy and smooth. Slowly add powdered sugar on low speed to avoid a sugar cloud, then mix in the vanilla, heavy cream or milk, and a pinch of salt. Beat everything on medium-high until your frosting looks fluffy, light, and easy to spread.
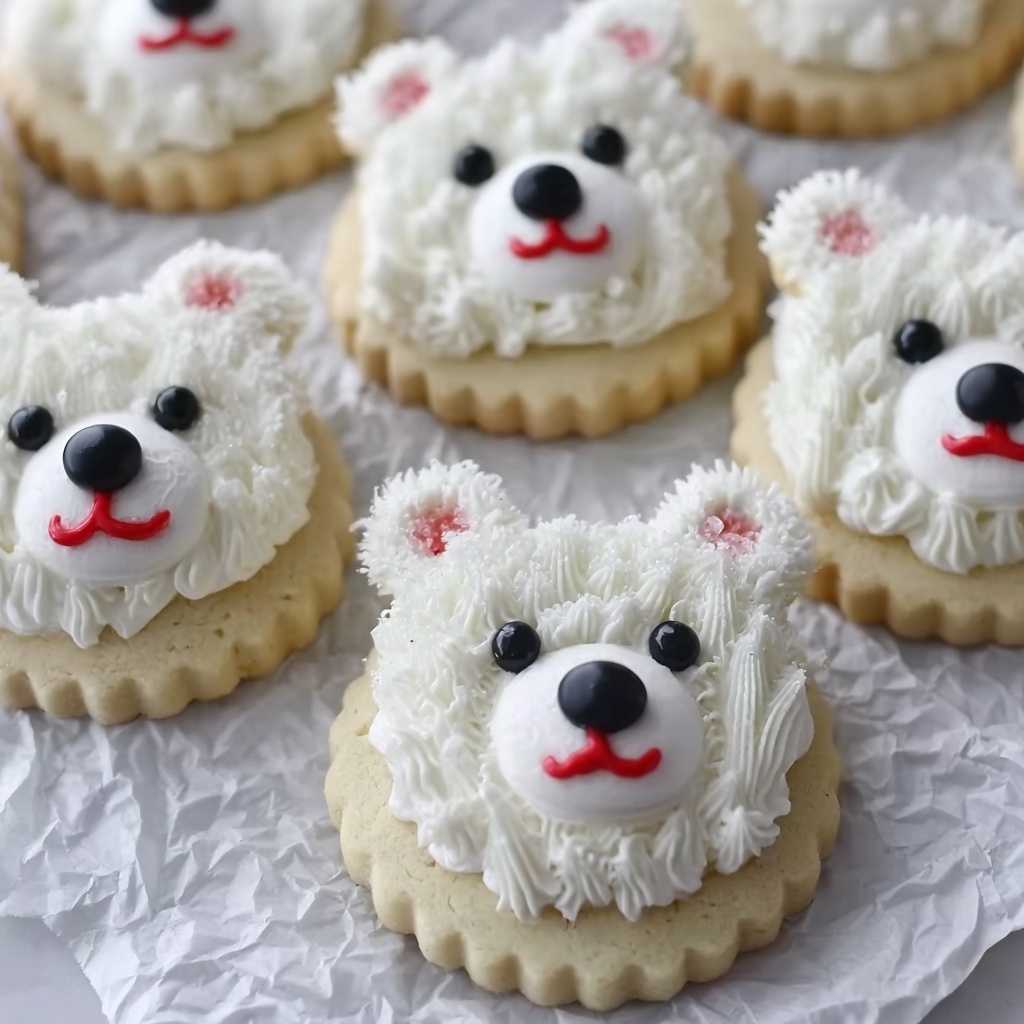
Step 6: Decorate the Polar Bear Cookies Recipe
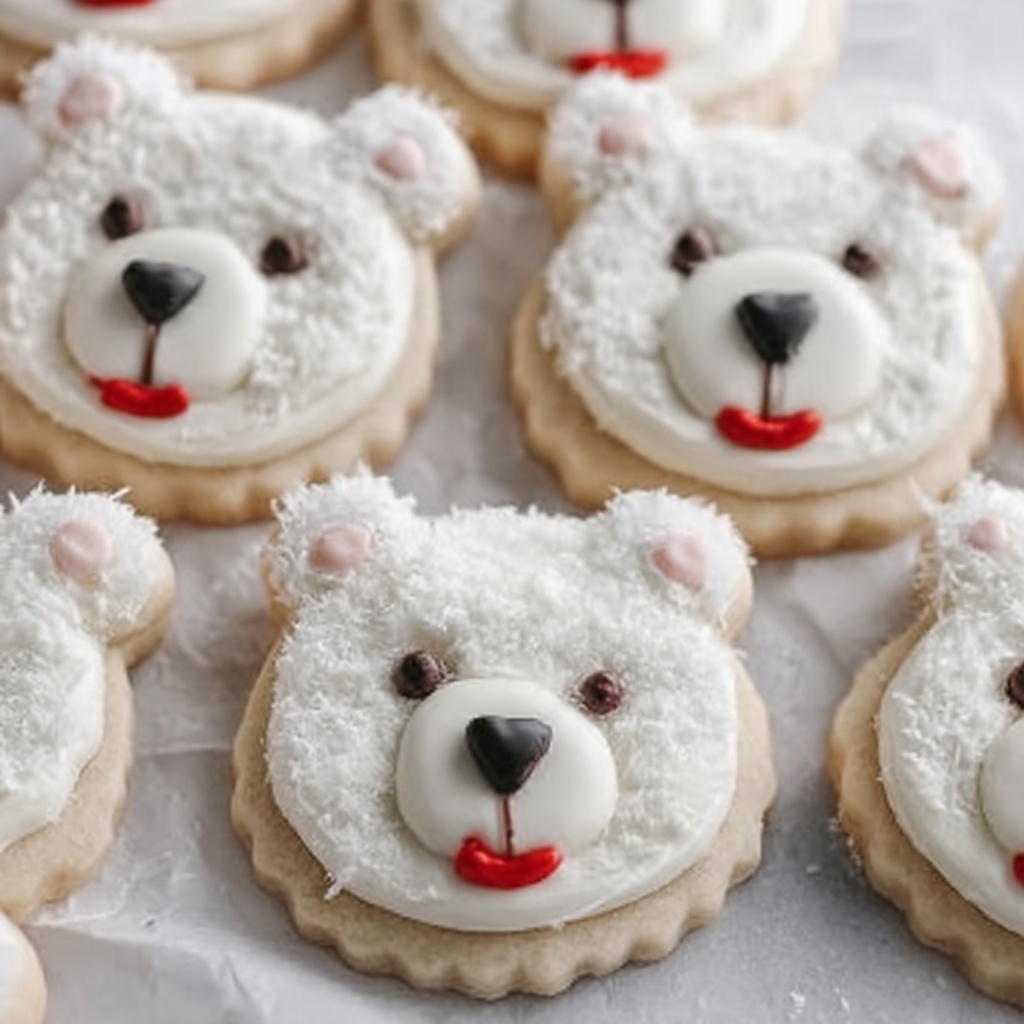
Spread a thin, even layer of buttercream on each cooled cookie, then dip the frosted side into white sanding sugar for that magical snowy finish. Pipe an oval of frosting at the bottom center to form the muzzle, then press a chocolate chip nose right on top. Above the muzzle, place black sprinkles as eyes, and use the red or pink sprinkles inside the ears to give your bears adorable detail and cheerful personality. Decorating is where this Polar Bear Cookies Recipe truly comes alive, so feel free to get creative and enjoy the process!
How to Serve Polar Bear Cookies Recipe

Garnishes
To make these cookies truly special when serving, consider adding a sprinkle of edible glitter or an extra dusting of powdered sugar for a frosty, wintery sparkle. Mint leaves or small cinnamon sticks on the side can enhance the presentation and offer a subtle aroma that pairs nicely with the sweet, creamy flavors of the cookies.
Side Dishes
Polar Bear Cookies shine alongside a cozy mug of hot cocoa, a frothy chai latte, or even a simple glass of cold milk. If you want to get festive, serving the cookies on a platter with fresh berries or alongside a small bowl of whipped cream can turn your snack into an inviting treat perfect for guests of all ages.
Creative Ways to Present
Use a wooden serving board decorated with pine sprigs or faux snow cotton to create a whimsical winter forest scene. Arrange the cookies in a circle to resemble a bear’s face or nestle them in a festive cookie jar layered with parchment paper. Adding holiday-themed ribbons or tying a few cookies together with twine make charming gifts and party favors, guaranteed to delight everyone who receives them.
Make Ahead and Storage
Storing Leftovers
Leftover Polar Bear Cookies store wonderfully in an airtight container at room temperature for up to a week. Make sure the frosting has completely set before packing them away to prevent any sticky mishaps. Proper storage keeps the cookies soft and maintains their lovely decorations just the way you made them.
Freezing
If you want to prepare these beauties ahead of time, freeze the baked and cooled cookies without frosting by layering them between sheets of parchment paper in a sealed freezer bag or container. They can be frozen for up to three months. When you’re ready to enjoy, thaw them at room temperature before frosting and decorating for the best results.
Reheating
To refresh frozen cookies, warm them gently in a low oven (about 300°F / 150°C) for a few minutes or microwave for 10-15 seconds to regain some of their fresh-baked softness. Be careful not to heat too long, especially if already frosted, to avoid melting the decorations. Enjoy them with your favorite warm beverage for a cozy treat.
FAQs
Can I make Polar Bear Cookies Recipe vegan or dairy-free?
Absolutely! Substitute the butter and cream cheese with your favorite plant-based alternatives and use a flax or chia egg in place of the chicken egg. The texture may be slightly different but still deliciously soft and charming.
Do I need the almond extract?
The almond extract is optional but highly recommended if you want a subtle nutty depth that complements the vanilla. If you don’t have it, the cookies will still be delicious with vanilla alone.
Can I use a different size cookie cutter?
Yes! The suggested sizes work best for the polar bear face and ears, but feel free to experiment. Just remember that baking time may vary slightly depending on the thickness and size of your cookies.
How long will the decorated cookies keep their freshness?
When stored properly in an airtight container, decorated Polar Bear Cookies stay fresh for up to one week at room temperature. Ensure the frosting has set completely before storing to prevent any stickiness or texture changes.
Can I skip the sanding sugar topping?
Of course! The sanding sugar gives a beautiful frosty sparkle, but the cookies are just as tasty without it. Feel free to decorate with whatever sprinkles or edible decorations you have on hand to personalize your polar bears.
Final Thoughts
There’s something truly magical about the Polar Bear Cookies Recipe — it combines the joy of baking with a playful, heartwarming design that’s impossible not to love. Whether you’re making them for family, friends, or yourself, these cookies bring smiles and sweet memories to any occasion. I can’t wait for you to try this recipe and experience the fun of creating your own little bakery-style polar bears!
Print
Polar Bear Cookies Recipe
- Total Time: 1 hour 20 minutes
- Yield: 30 cookies 1x
- Diet: Vegetarian
Description
Delightfully festive Polar Bear Cookies featuring soft, creamy cookie dough with a subtle almond and vanilla flavor, topped with luscious buttercream frosting and charming chocolate and sprinkle details to create adorable polar bear faces. Perfect for holiday gatherings or winter-themed parties, these cookies combine tender texture with whimsical decoration.
Ingredients
Cookie Dough
- 3/4 cup (170g) unsalted butter, room temperature
- 1/2 cup (113g) cream cheese, room temperature
- 1 cup (200g) granulated sugar
- 1 large egg, room temperature
- 1 teaspoon vanilla extract
- 1/2 teaspoon almond extract (optional)
- 3 cups (375g) all-purpose flour
- 2 teaspoons cornstarch
- 1/2 teaspoon baking powder
- 1/2 teaspoon salt
Buttercream Frosting
- 1/2 cup (113g) unsalted butter, room temperature
- 2 cups (250g) powdered sugar
- 1 teaspoon vanilla extract
- 2 tablespoons heavy cream or milk
- Pinch of salt
Decorations
- White sanding sugar or granulated sugar
- Large chocolate chips (for noses)
- Black round sprinkles (for eyes)
- Red or pink round sprinkles (for inner ears)
Instructions
- Prepare the Cookie Dough: In a large mixing bowl, cream together the unsalted butter, cream cheese, and granulated sugar until the mixture becomes light and fluffy, creating a smooth base for your cookies.
- Add Wet Ingredients: Incorporate the egg, vanilla extract, and optional almond extract into the creamed mixture, mixing until fully combined and uniform in texture.
- Combine Dry Ingredients: In a separate bowl, whisk together the all-purpose flour, cornstarch, baking powder, and salt to evenly distribute the leavening and seasoning agents.
- Mix Dry and Wet Ingredients: Gradually add the dry ingredients into the wet mixture, stirring until just combined to form the cookie dough without overworking it.
- Chill the Dough: Divide the dough into portions, flatten each into discs, wrap them tightly in plastic wrap, and chill in the refrigerator for at least 2 hours or freeze for 30 minutes to firm up the dough for easier handling.
- Prepare for Baking: Preheat your oven to 350°F (175°C) and line baking sheets with parchment paper to prevent sticking and promote even baking.
- Roll out Dough: On a floured surface, roll out the chilled dough to about 1/3 inch thickness, ensuring even thickness for uniform baking.
- Cut Bear Faces: Use a 2 1/2-inch round cookie cutter to cut out the main bear face shapes from the dough.
- Cut Bear Ears: Cut smaller circles using a 3/4-inch cutter and trim a flat edge on each to serve as ears, then gently attach these ears to the top of the larger cookie faces by pressing lightly.
- Chill Cookies Before Baking: Place the shaped cookies into the fridge for 15 minutes to help them hold their shape during baking.
- Bake the Cookies: Bake the cookies in the preheated oven for 10-13 minutes until the edges are set but not browned, to maintain a soft texture.
- Cool Cookies: Allow the cookies to cool on the baking sheet for 15 minutes to firm up slightly before transferring them to a wire rack to cool completely.
- Prepare the Buttercream Frosting: Beat the unsalted butter until creamy, gradually add powdered sugar while mixing on low speed, then add vanilla extract, heavy cream (or milk), and a pinch of salt. Beat on medium-high speed until the frosting is fluffy and smooth.
- Frost the Cookies: Spread a thin layer of buttercream frosting on the cooled cookies evenly to create a sticky surface for the sugar coating.
- Add Sugar Coating: Dip or sprinkle the frosted side into white sanding sugar or granulated sugar to create a sparkling, smooth finish resembling polar bear fur.
- Decorate Faces: Pipe a small oval of frosting at the bottom center of each cookie to form the muzzle, then place a large chocolate chip on top as the nose.
- Add Facial Features: Place black round sprinkles above the muzzle for the eyes and attach red or pink round sprinkles within the ears to add cute inner ear details.
Notes
- For firmer cookies, chill the dough overnight before rolling and cutting.
- If you do not have almond extract, you can omit it without altering the overall flavor dramatically.
- Ensure cookies do not brown excessively to maintain a tender texture.
- Use room temperature ingredients to help the dough and frosting blend properly.
- Decorate cookies only after they have completely cooled to prevent melting the frosting.
- Prep Time: 20 minutes
- Cook Time: 13 minutes
- Category: Dessert
- Method: Baking
- Cuisine: American