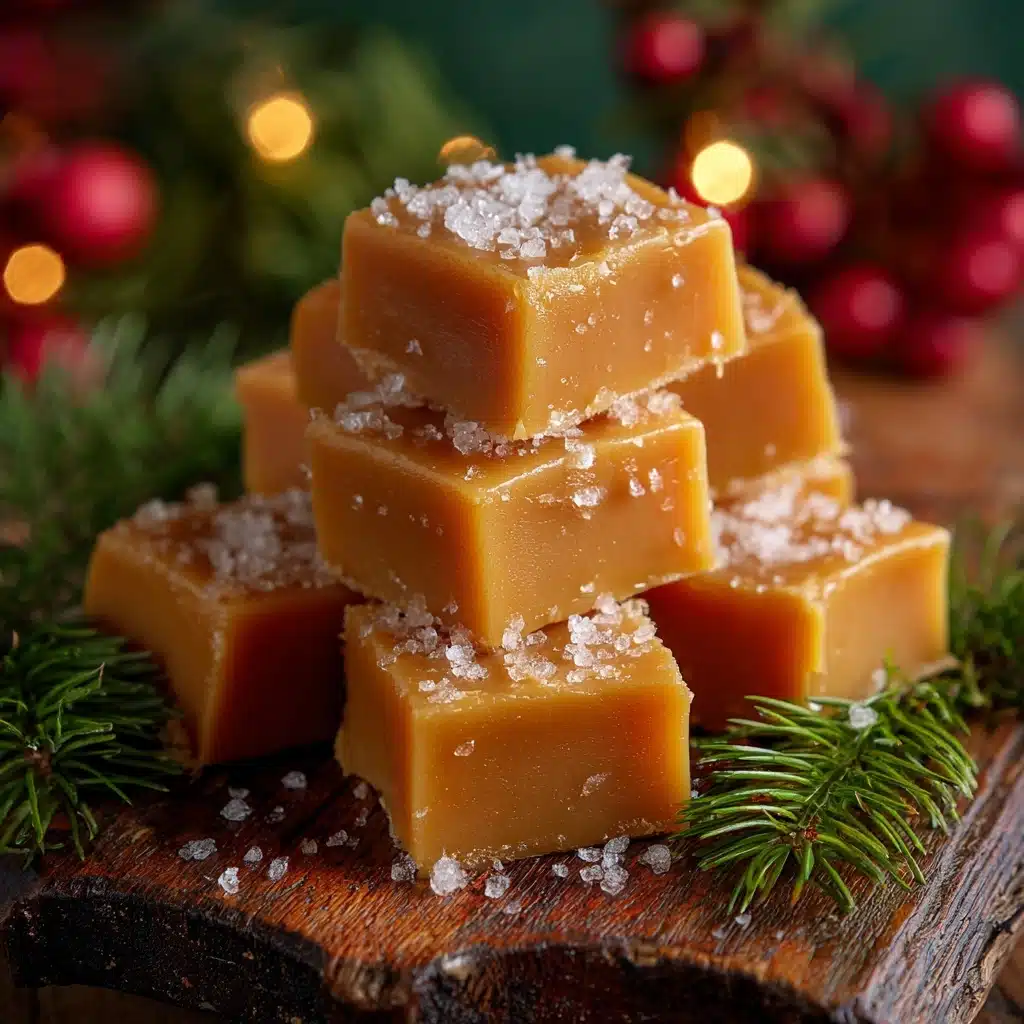
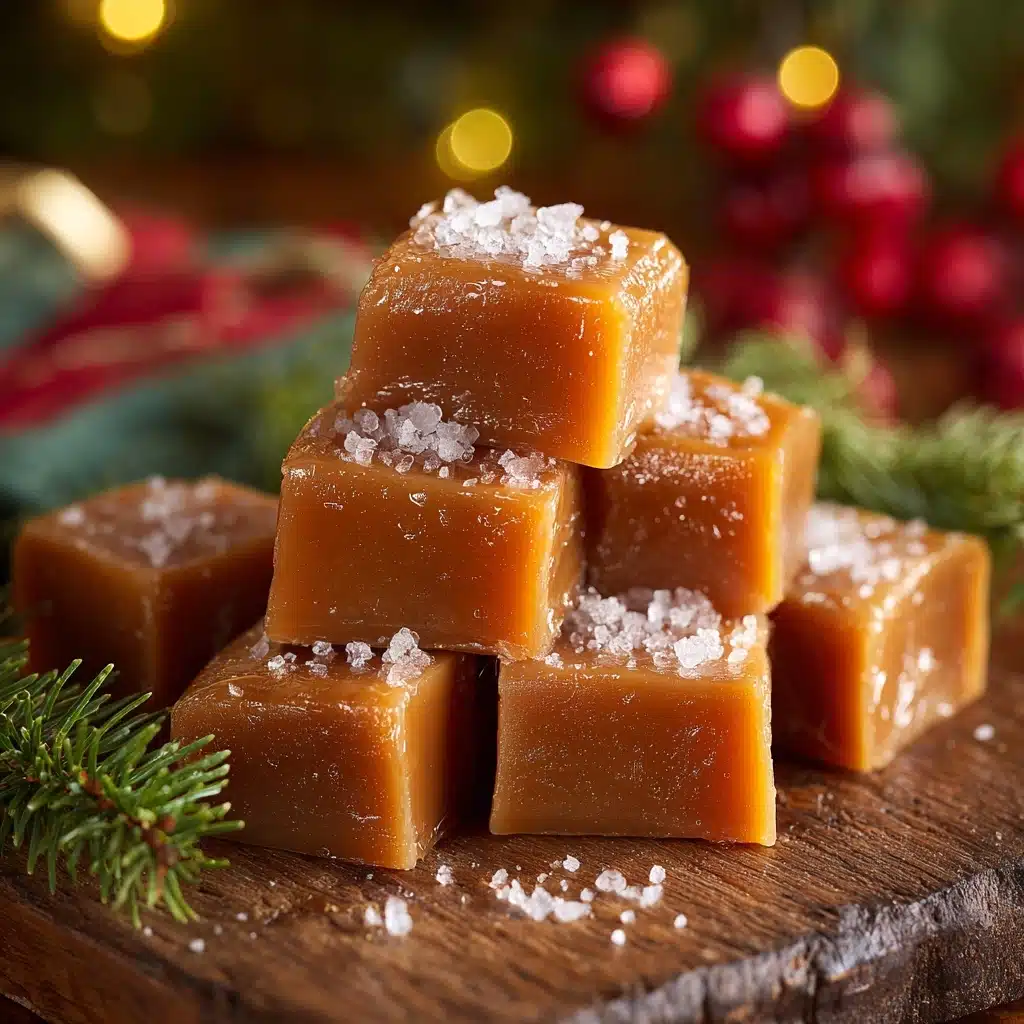
Soft, buttery, and sweet with just the right hint of salt, Homemade Christmas Caramels deliver everything we love most about timeless holiday treats. Every square is a little bite of nostalgia, perfectly chewy and rich, destined to be shared on cookie trays or tucked into festive gift bags. Making homemade candy feels like the heart of the season, filling your kitchen with warmth and anticipation as the magical scent of caramel bubbles away on the stove. If you’ve never made your own caramels, this is the recipe to turn a simple collection of ingredients into something truly special and memorable.
Ingredients You’ll Need
It’s almost unbelievable how just six pantry staples create such luscious Homemade Christmas Caramels. Each ingredient plays a starring role, from imparting that signature golden color to ensuring the caramels have the perfect melt-in-your-mouth texture. Here’s why you don’t want to swap a single thing:
- Unsalted butter: Lends a deeply rich flavor and guarantees a creamy texture that’s essential for luxurious caramels.
- Packed light brown sugar: Adds bespoke sweetness and moisture, giving your caramels their signature softness.
- Light corn syrup: Prevents unwanted crystallization so your caramels turn out smooth and glossy every single time.
- Sweetened condensed milk: Intensifies the creamy sweetness and helps create a soft chew you can’t resist.
- Salt: Heightens all the flavors and brings perfect balance to the rich, sweet notes—don’t skip it!
- Vanilla extract: Rounds out the flavor with aromatic warmth, delivering that classic homemade caramel essence.
How to Make Homemade Christmas Caramels
Step 1: Prep Your Pan
Start by lining a 9×9-inch baking pan with parchment paper, leaving a couple of inches overhanging on both sides. This clever parchment “sling” makes it a breeze to lift out and slice your finished caramels, so don’t skip this simple prep. Trust me, this one little step is a game-changer when it comes to mess-free cutting and serving.
Step 2: Melt the Butter
Grab your largest, heavy-bottomed saucepan—trust me, caramel bubbles up more than you’d expect! Toss in the unsalted butter and let it gently melt over medium heat. The butter needs to be fully melted before anything else goes in, ensuring a smooth emulsification when you add the sugars and syrups. Once melted, your kitchen will start to smell a little heavenly!
Step 3: Stir Together the Sugar Mixture
Pour the packed light brown sugar, light corn syrup, and that all-important can of sweetened condensed milk into the melted butter. Stir to combine everything. The mixture will look glossy and pale at first. Take your time with this step, making sure everything is fully blended, as this helps the caramels cook evenly and prevents sugar lumps.
Step 4: Cook to Perfection
This is the magical part! Attach a reliable candy thermometer to your saucepan. Over medium heat, cook the mixture, stirring constantly with a heatproof spatula or wooden spoon. Patience pays off here: you’re aiming for the caramel to reach exactly 245°F, the “firm ball” stage, which takes about 10 to 15 minutes. Stir, stir, stir! This prevents burning and ensures all that caramel goldiness is just right. When your thermometer hits 245°F, take the saucepan off the heat immediately.
Step 5: Add the Finishing Touches
Now, quickly stir in the salt and vanilla extract. The mixture will bubble up a bit when you add the vanilla—this is totally normal. These two ingredients are what make your Homemade Christmas Caramels next-level, adding depth and a spark of holiday flavor. Work fast so everything stays smooth.
Step 6: Pour and Set
With a steady hand, carefully pour the hot caramel into your prepared pan. Use a spatula to coax every glorious drop into the corners and gently smooth the top. For an extra touch, sprinkle flaky sea salt over the caramel while it’s still hot—a secret your future self will thank you for! Now comes the hardest part: let the pan sit undisturbed at room temperature for several hours, or even better, overnight, until completely cool and set.
Step 7: Slice and Wrap
Once the block of caramel is firm and cool, use the parchment overhang to lift it out of the pan. Place it onto a cutting board and cut into even squares using a sharp knife. For a timeless Christmas touch, wrap each square in wax paper or cellophane. Now your Homemade Christmas Caramels are ready for snacking, gifting, or holiday sharing!
How to Serve Homemade Christmas Caramels

Garnishes
The simplest flourish for your caramels is a sprinkle of flaky sea salt—add it just after pouring when the caramel is hot, so it adheres perfectly. For a festive vibe, try dipping half of each caramel in melted dark or white chocolate and topping with crushed peppermint or toasted nuts. The contrast of flavors and textures is absolutely delightful and makes your Homemade Christmas Caramels look irresistible on any dessert tray.
Side Dishes
Because they’re so rich and buttery, Homemade Christmas Caramels pair well with light and crisp treats like ginger cookies or shortbread. They’re also incredible with fresh fruit, especially sliced apples or pears. For something really decadent, serve alongside mugs of hot cocoa, spiced tea, or even eggnog for a true holiday dessert spread.
Creative Ways to Present
Turn your Homemade Christmas Caramels into heartfelt gifts by wrapping each piece in colorful wax paper, ribbon, or snowflake-printed cellophane. Arrange them in decorative tins, glass jars, or mini gift boxes for a personal touch. A handwritten tag and sprig of holly or pine make the whole package feel extra special and festive—an unforgettable homemade present!
Make Ahead and Storage
Storing Leftovers
To keep your Homemade Christmas Caramels soft and fresh, store them in an airtight container at room temperature. They’ll stay chewy and delicious for up to two weeks (if they last that long!). Wax paper wrapping not only prevents sticking but also preserves their pretty shape and texture.
Freezing
If you want your caramels to last even longer, freezing is a wonderful option. Wrap each caramel piece individually, then pop them in a freezer-safe container or zip-top bag. They’ll keep beautifully for up to three months. To serve, let them thaw at room temperature for about an hour, and they’ll taste as dreamy as the day you made them.
Reheating
While Homemade Christmas Caramels are best enjoyed at room temperature, if you prefer a slightly softer chew, let them sit out for a bit or warm gently (just for a few seconds!) in the microwave. Avoid overheating, or they’ll lose their perfect texture. You might just discover your favorite new way to enjoy them!
FAQs
Do I really need a candy thermometer?
For Homemade Christmas Caramels, a candy thermometer is practically essential for perfect results. It takes the guesswork out and ensures you hit the precise temperature for that dreamy, chewy texture—worth the tiny investment!
Why did my caramels come out too hard or too soft?
This is usually a temperature issue. Too soft means they didn’t reach 245°F; too hard means they went past it. Stir constantly, watch the thermometer, and pull them off the heat the moment you reach the right temp.
Can I make these caramels without corn syrup?
Corn syrup is key for preventing graininess, but if you absolutely must substitute, you can try honey or golden syrup for a slightly different flavor and texture. Just know it may affect the smoothness and softness of the caramels.
How do I prevent the caramel from sticking to the knife?
Try lightly spraying your knife with nonstick cooking spray or wiping it with a bit of oil between cuts. You can also chill the caramel block briefly in the fridge to make slicing even easier.
Are Homemade Christmas Caramels gluten-free?
Yes, this recipe is naturally gluten-free since all the ingredients are safe for those avoiding gluten. Just double-check your vanilla extract and any extra toppings you use to ensure a gluten-free treat all around!
Final Thoughts
This is the kind of recipe that sparks joy year after year—there’s nothing quite like the tradition of making Homemade Christmas Caramels to share with friends and family. Whether you’re gifting them or enjoying a few yourself, these buttery bites are little reminders of how simple ingredients can create the sweetest memories. Try a batch this season and let the magic begin!
Print
Homemade Christmas Caramels Recipe
- Total Time: 25 minutes (plus cooling time)
- Yield: 64 pieces 1x
- Diet: Vegetarian
Description
Indulge in the sweet, buttery goodness of these homemade Christmas caramels. Perfect for holiday gifting or as a festive treat for yourself!
Ingredients
Main Ingredients:
- 1 cup unsalted butter
- 2 ¼ cups packed light brown sugar
- 1 cup light corn syrup
- 1 (14 oz) can sweetened condensed milk
- ½ teaspoon salt
- 1 teaspoon vanilla extract
Instructions
- Prepare the Pan: Line a 9×9-inch baking pan with parchment paper, leaving some overhang on the sides for easy removal.
- Cook the Caramel: In a large saucepan, melt the butter. Stir in brown sugar, corn syrup, and sweetened condensed milk. Cook until it reaches 245°F on a candy thermometer.
- Finish the Caramels: Remove from heat, stir in salt and vanilla. Pour into the pan, let cool, then cut into squares and wrap in wax paper.
Notes
- Use a candy thermometer for accuracy.
- Try sprinkling sea salt on top for a salty version.
- Store in an airtight container for up to 2 weeks.
- Prep Time: 10 minutes
- Cook Time: 15 minutes
- Category: Candy
- Method: Stovetop
- Cuisine: American
Nutrition
- Serving Size: 1 piece
- Calories: 90
- Sugar: 10g
- Sodium: 35mg
- Fat: 5g
- Saturated Fat: 3g
- Unsaturated Fat: 1g
- Trans Fat: 0g
- Carbohydrates: 11g
- Fiber: 0g
- Protein: 0g
- Cholesterol: 10mg