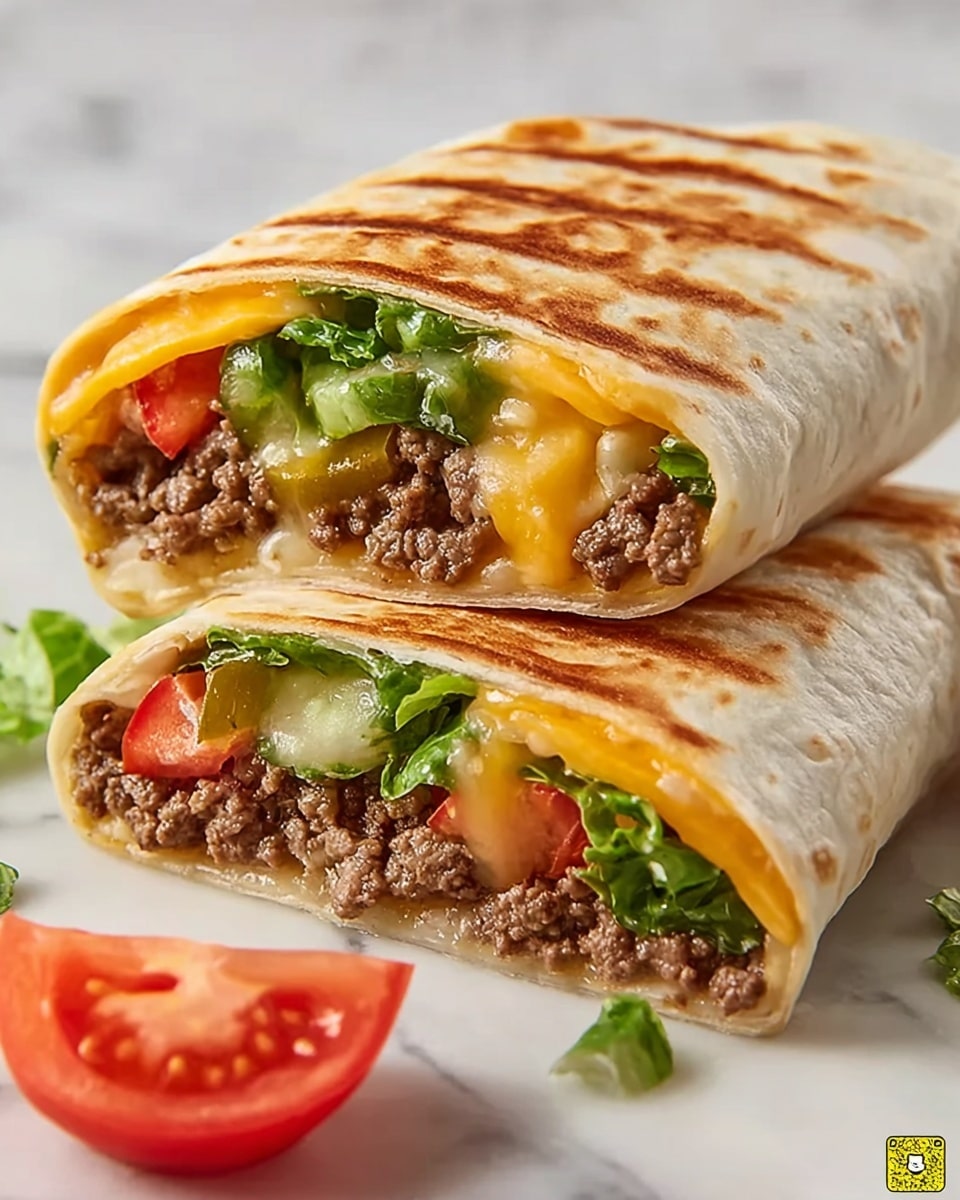
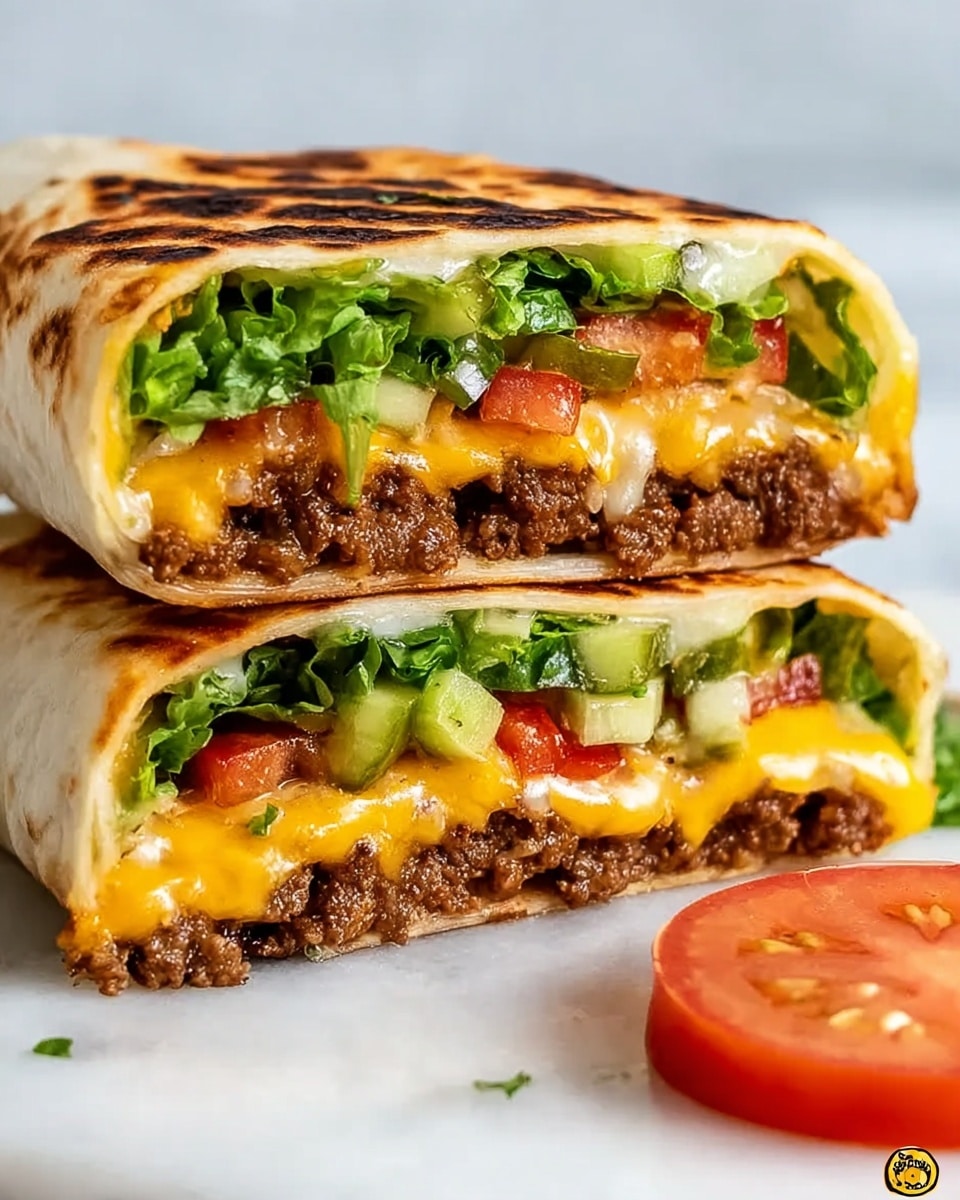
If you are craving the classic flavors of a cheeseburger but want something a bit handier and perfect for any casual meal, this Grilled Cheeseburger Wraps Recipe is exactly what you need. Bursting with juicy seasoned beef, melty cheese, fresh veggies, and a hint of tangy condiments, these wraps are an irresistible twist on the beloved burger experience. Quick to make and wonderfully customizable, this recipe will become your go-to for satisfying, delicious wraps that everyone will love.
Ingredients You’ll Need
Gathering simple, fresh ingredients is key to nailing the perfect Grilled Cheeseburger Wraps Recipe. Each one brings its own magic from rich and savory to crisp and fresh, creating marvelously balanced bites.
- Lean ground beef (1 pound): The hearty base loaded with juicy, savory flavor.
- Medium tortilla wraps (5): These soft, pliable wraps hold all the fillings together and crisp up nicely when grilled.
- American cheese slices (5): The melty cheese that makes each bite decadently smooth and classic.
- Roma tomatoes (2, sliced): Adds juicy freshness and a pop of color.
- Romaine lettuce (1 cup, chopped): Crunchy texture and vibrant green hues for contrast.
- Worcestershire sauce (1 tablespoon): Deep, umami boost that takes the beef flavor to another level.
- Ketchup (1 tablespoon plus extra for serving): The perfect sweet-tangy burger condiment.
- Grated Parmesan cheese (1 tablespoon): Adds a subtle sharpness and cheesy nuance.
- Onion powder (1 teaspoon): Enhances the savory profile without overpowering.
- Garlic powder (1 teaspoon): Warm, aromatic seasoning for complexity.
- Salt and black pepper (each 1/8 teaspoon): Essential seasoning to balance all flavors perfectly.
- Optional diced onions: For an extra punch of pungent zest.
- Mustard, mayonnaise, relish (optional for serving): Customize your wrap with your favorite burger toppings.
How to Make Grilled Cheeseburger Wraps Recipe
Step 1: Brown the Ground Beef
Start by heating a large skillet over medium heat with a light coating of cooking spray. Add the lean ground beef and cook it until nicely browned, about 7 to 10 minutes. As it cooks, break the meat into small pieces with a spatula so no large clumps remain. Aim to cook it until it’s almost done but still slightly pink inside, which allows the beef to develop those deep, savory flavors that are essential for a mouthwatering wrap.
Step 2: Season the Beef
Once the beef is browned, stir in Worcestershire sauce, ketchup, grated Parmesan, onion powder, garlic powder, salt, and black pepper. Mixing these ingredients thoroughly helps infuse the beef with that unmistakable grilled cheeseburger flavor that defines this recipe. The Worcestershire sauce and Parmesan cheese add layers of umami that transform simple ground beef into something truly special.
Step 3: Finish Cooking the Meat
Continue cooking the seasoned beef mixture until the meat is no longer pink but perfectly cooked through. The mix should be well combined and fragrant, ready to take center stage in your wraps. This step ensures that every bite is juicy and flavorful without losing that satisfying burger texture.
Step 4: Assemble the Wraps
Lay out each tortilla wrap and place a slice of American cheese in the center. Then, evenly spoon about 1/3 cup of the cooked beef mixture onto the cheese, spreading it gently. Top the beef with sliced Roma tomatoes and chopped romaine lettuce to add freshness and crunch. If you like, sprinkle some diced onions for added bite, layering textures and flavors beautifully inside each wrap.
Step 5: Add Condiments
Spread your favorite condiments over the fillings—ketchup, mustard, and a touch of mayonnaise work wonders to add moisture and extra flavor. Adjust to your personal tastes to enhance the wrap’s profile. These classic burger sauces tie all the elements together in every bite.
Step 6: Roll and Grill
Roll each tortilla tightly, making sure to tuck the fillings in neatly so they don’t spill out. Place each wrap seam side down on a preheated indoor grill or grill pan set to medium-high heat. Grill for 3 to 4 minutes until you see beautiful grill marks and the tortillas develop a slightly crunchy texture. This grilling step is what turns these wraps into irresistible handheld delights.
Step 7: Grill the Other Side
Flip the wraps carefully and grill the other side for another 3 to 4 minutes. You’ll know they are done when they feature golden brown grill marks, feel crisp to the touch, and the cheese inside has melted to gooey perfection. This ensures every bite is warm, cheesy, and satisfying.
Step 8: Keep Warm and Serve
Once grilled, transfer the wraps to a warm spot or an oven set to low heat while you finish grilling the rest. Keeping them warm means everyone gets to enjoy the wraps fresh, with the cheese still melty and the tortilla perfectly crispy.
How to Serve Grilled Cheeseburger Wraps Recipe
Garnishes
A sprinkle of fresh chopped parsley or a few pickle slices on the side add an inviting burst of color and freshness. You might also offer extra ketchup, mustard, or a creamy dipping sauce like ranch for those who love a flavor-packed bite with every mouthful. Garnishes brighten the plate and elevate the whole eating experience.
Side Dishes
Crispy oven-baked fries, a simple garden salad, or even coleslaw pair perfectly with these wraps. These sides complement the rich, cheesy flavors and offer great textural contrasts that keep the meal balanced and exciting. For a lighter alternative, try sweet potato wedges seasoned with smoked paprika.
Creative Ways to Present
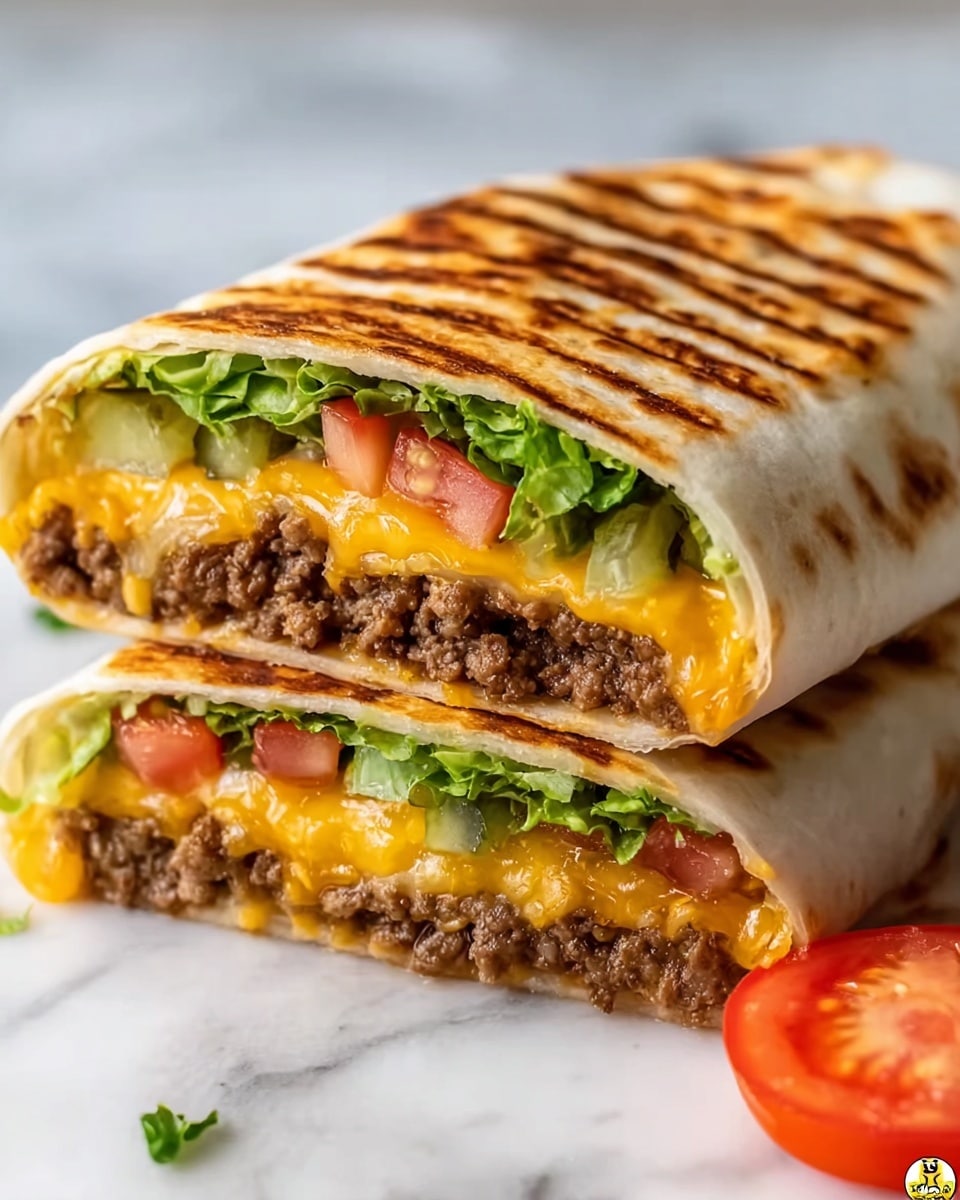
Slice the wraps diagonally to show off the layered fillings and serve stacked up for a fun, casual vibe. Wrapping them in parchment paper and tying with a string makes for charming party fare or picnic-ready snacks. For the ultimate presentation, serve alongside mini dipping bowls filled with mustard, ketchup, and mayo to let everyone customize their bites.
Make Ahead and Storage
Storing Leftovers
You can store any leftover grilled cheeseburger wraps in an airtight container in the refrigerator for up to 3 days. Keep them wrapped tightly in foil or plastic wrap to preserve freshness and prevent drying out. When ready to eat, they may need a quick reheat to restore that crispy wrap texture and melty cheese.
Freezing
Wrap each grilled cheeseburger wrap individually in plastic wrap and place them in a freezer-safe bag. They freeze well for up to 1 month. When freezing, it’s best to cool the wraps completely before sealing to avoid condensation which could lead to sogginess later on.
Reheating
For best results, reheat wraps in a preheated oven at 350°F (175°C) for 10-15 minutes to regain crispiness and fully melt the cheese again. Avoid microwaving if possible, as it can make the wraps soggy. If you do use a microwave, wrap the sandwich in a damp paper towel to help retain moisture without making the tortilla limp.
FAQs
Can I use other types of cheese for this Grilled Cheeseburger Wraps Recipe?
Absolutely! While American cheese melts beautifully and offers that classic burger vibe, you can experiment with cheddar, pepper jack, or even mozzarella for different flavor twists. Just pick a cheese that melts well to keep things gooey and delicious.
Is it possible to make these wraps vegetarian?
Yes, you can substitute the ground beef with plant-based meat alternatives or cooked lentils seasoned the same way. Add grilled veggies or mushrooms for a hearty, satisfying vegetarian wrap that still honors the grilled cheeseburger concept.
Can I prepare the filling ahead of time?
Definitely! The seasoned beef mixture can be cooked and refrigerated a day in advance. Just reheat it gently before assembling your wraps to keep everything warm and flavorful.
What type of tortilla works best?
Medium flour tortillas are ideal since they’re sturdy enough to hold all the fillings and crisp nicely on the grill. You can try whole wheat or flavored tortillas too, depending on your preference.
How can I add extra veggies without making the wrap soggy?
Use crisp, fresh veggies like romaine lettuce and firm tomato slices, and add them right before serving. To avoid sogginess, pat tomato slices dry with a paper towel and avoid overly watery ingredients. Adding a light spread of condiments also helps keep moisture balanced.
Final Thoughts
This Grilled Cheeseburger Wraps Recipe is such a fun and delicious way to enjoy all the flavor of a cheeseburger with a fresh, portable twist. It’s quick to prepare, easy to customize, and guarantees smiles around the table. I encourage you to try making these wraps soon—you might just find a new favorite comfort meal that becomes a regular in your recipe rotation!
Print
Grilled Cheeseburger Wraps Recipe
- Total Time: 30 minutes
- Yield: 5 servings 1x
Description
These Grilled Cheeseburger Wraps combine the classic flavors of a cheeseburger with the convenience of a handheld wrap. Featuring seasoned ground beef, melted American cheese, fresh tomatoes, and crisp romaine lettuce, all wrapped in a grilled tortilla for a deliciously crunchy finish. Perfect for a quick weeknight meal or casual gatherings.
Ingredients
Beef Filling
- 1 pound (454 g) lean ground beef
- 1 tablespoon Worcestershire sauce
- 1 tablespoon ketchup
- 1 tablespoon grated Parmesan cheese
- 1 teaspoon onion powder
- 1 teaspoon garlic powder
- 1/8 teaspoon salt
- 1/8 teaspoon black pepper
- Optional: diced onions
Wraps & Toppings
- 5 medium tortilla wraps
- 5 slices American cheese
- 2 Roma tomatoes, sliced
- 1 cup romaine lettuce, chopped (about 1/5 cup per wrap)
- Optional: ketchup, mustard, mayonnaise, relish for serving
Instructions
- Cook the ground beef: Heat a large skillet coated with cooking spray over medium heat. Add the lean ground beef and cook for 7 to 10 minutes, breaking it up with a spoon to avoid large clumps, until it is browned but still slightly pink to develop rich savory flavor.
- Season the beef mixture: Stir in Worcestershire sauce, ketchup, grated Parmesan cheese, onion powder, garlic powder, salt, and black pepper into the beef. Mix thoroughly until well combined.
- Finish cooking the beef: Continue cooking the beef mixture until it is fully cooked through and no longer pink, ensuring all flavors are well melded.
- Assemble the wraps: On the center of each tortilla wrap, place one slice of American cheese. Top with approximately 1/3 cup (about 80 g) of the cooked beef mixture evenly spread. Add sliced tomatoes and about 1/5 cup of chopped romaine lettuce. Add diced onions if desired for extra sharpness.
- Add condiments: Spread ketchup, mustard, and a little mayonnaise on top of the fillings as desired to enhance flavor and moisture within the wrap.
- Roll and grill the wraps: Roll each tortilla wrap tightly, ensuring the fillings stay centered and secure. Place the wraps seam side down on a preheated indoor grill or grill pan set to medium-high heat. Grill for 3 to 4 minutes until grill marks appear and the wrap develops a crunchy texture.
- Flip and grill the other side: Turn the wrap over carefully and grill for another 3 to 4 minutes until golden brown grill marks form, the wrap feels slightly crisp when pressed, and the cheese inside has fully melted.
- Keep wraps warm: Transfer the grilled wraps to a warming area or an oven set to low heat to keep them warm while you finish grilling the remaining wraps.
Notes
- Use lean ground beef to reduce excess grease but maintain flavor.
- Grill wraps seam side down first to ensure they stay rolled and intact.
- Adjust the amount of condiments based on your taste preference.
- Optional diced onions add a nice pungent crunch if desired.
- Serving with a side of pickles or fries complements this dish well.
- Prep Time: 10 minutes
- Cook Time: 20 minutes
- Category: Main Dish
- Method: Grilling
- Cuisine: American
