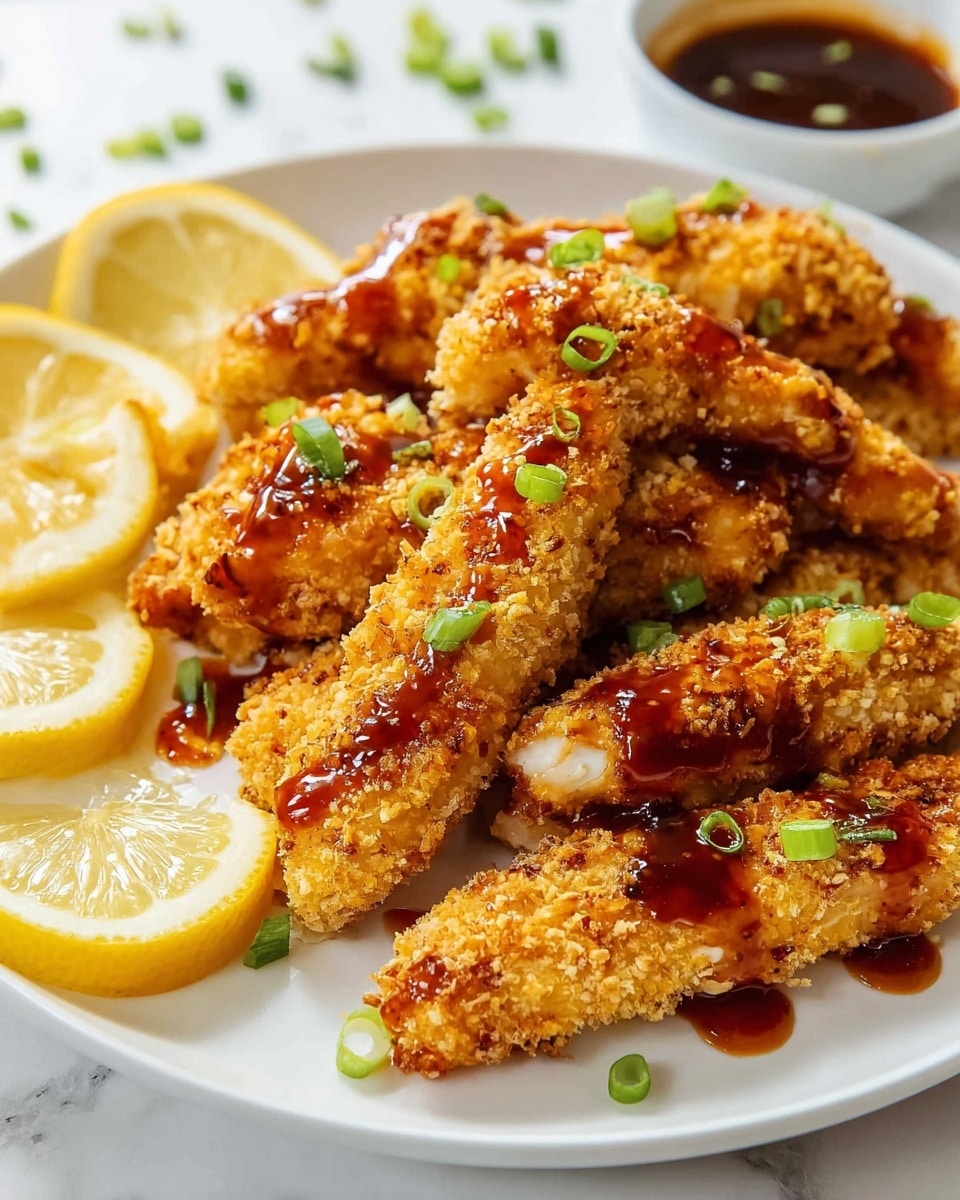
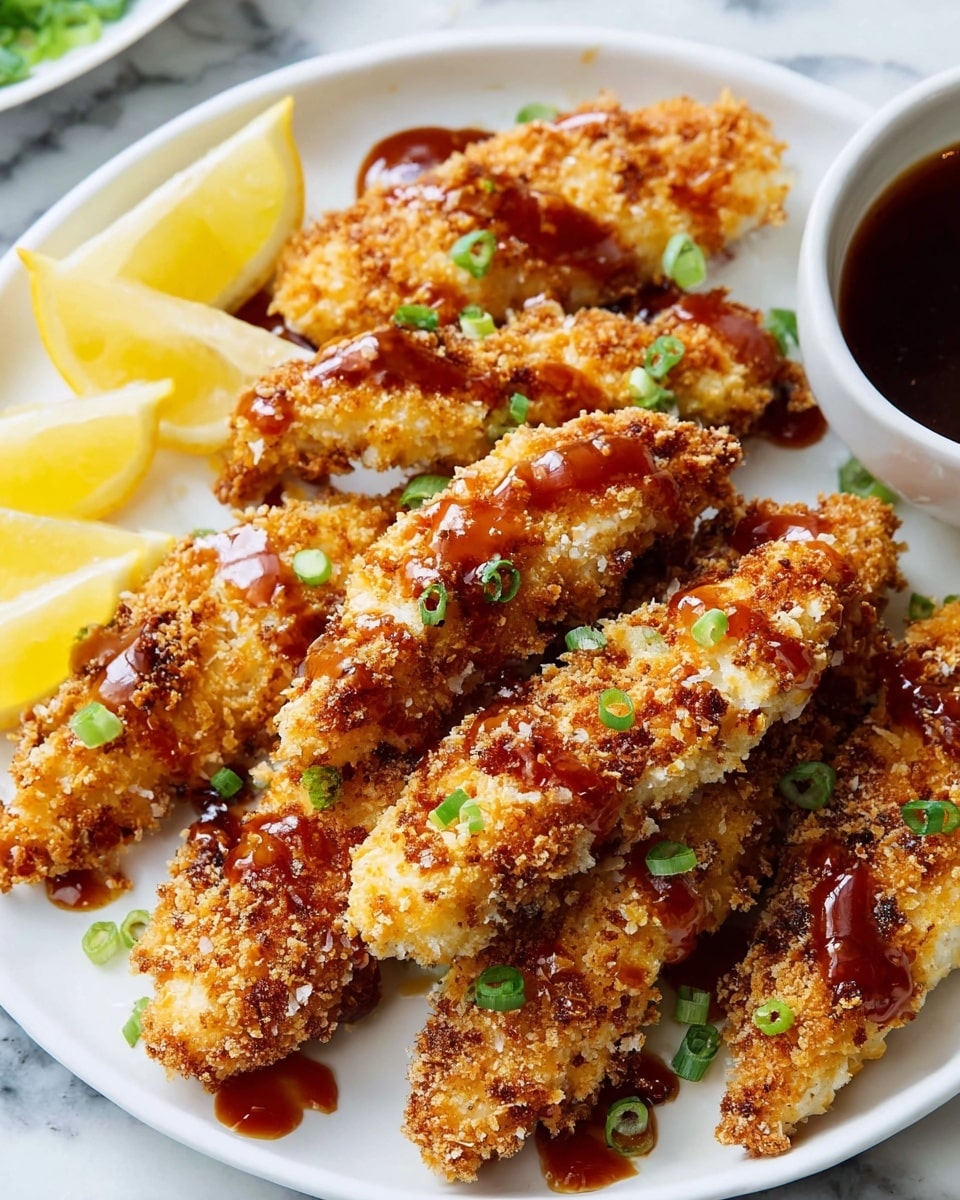
If you’re craving a dish that perfectly balances sweet, spicy, and savory flavors all wrapped around crispy, tender chicken fingers, then this Asian Glazed Chicken Fingers Recipe is going to be your new obsession. Imagine crunchy chicken strips soaked in buttermilk, dredged in seasoned flour and panko, then baked to golden perfection before being drenched in a luscious, sticky glaze packed with honey, soy sauce, and a kick of chili. It’s the ultimate crowd-pleaser that’s just as perfect for a cozy family dinner as it is for sharing at a casual get-together.
Ingredients You’ll Need
Each ingredient in this recipe is simple yet indispensable, contributing to the incredible flavor, texture, or aroma that makes the Asian Glazed Chicken Fingers Recipe stand out. From the tang of buttermilk to the fragrant warmth of Chinese five-spice, every component plays its part in creating a truly memorable dish.
- Honey: Adds a natural sweetness that balances the savory and spicy elements perfectly.
- Low-sodium soy sauce: Provides umami depth without overpowering saltiness.
- Sriracha sauce: Introduces a mild heat that wakes up the palate.
- Chili flakes: Give an additional subtle kick for those who love spice.
- Chinese five-spice powder: Infuses a complex aromatic blend that elevates the glaze beautifully.
- Garlic powder: Brings warmth and a touch of earthiness to the mix.
- Olive oil: Helps with cooking and adds a slight fruitiness.
- Rice vinegar: Balances richness with a mild tang.
- Salt and pepper: Essential for seasoning both the chicken and the dredging ingredients.
- Boneless, skinless chicken breasts: The lean protein base, cut into perfect strips for finger food.
- Buttermilk: Tenderizes the chicken and adds subtle tanginess.
- Panko breadcrumbs: For that irresistible crispy crust.
- All-purpose flour: Used to create the initial coating layer before dipping into buttermilk and breadcrumbs.
- Green onions (optional): For a fresh, crisp garnish that brightens the dish.
How to Make Asian Glazed Chicken Fingers Recipe
Step 1: Prepare the Glaze and Oven
Start by preheating your oven to 400°F (200°C) and lining a baking sheet with parchment paper to keep things clean and prevent sticking. Meanwhile, whisk together honey, soy sauce, sriracha, chili flakes, Chinese five-spice, garlic powder, olive oil, rice vinegar, salt, and pepper in a small saucepan. This magical mix will be the sauce that transforms simple chicken fingers into an extraordinary treat. Set it aside to develop those flavors as you prep the chicken.
Step 2: Prep the Chicken Strips
Cut your boneless, skinless chicken breasts into thin, uniform strips — this helps them cook evenly and become perfectly crispy. Toss these strips into a bowl with buttermilk; this bath does wonders to tenderize the chicken and add a subtle tang. While the chicken sits, set up three shallow dishes: one with seasoned flour, one with the remaining buttermilk, and one with seasoned panko breadcrumbs. This triple-step coating builds that irresistible crunch you’re aiming for.
Step 3: Coat the Chicken
Now it’s time for the fun part! Dredge each chicken strip first in the flour, then dip it back into the buttermilk, and finish by thoroughly coating it with the panko breadcrumbs. The contrast between the light flour layer and the crispy breadcrumb crust turns out delightfully crispy once baked. Place the battered strips evenly on your prepared baking sheet, making sure they’re not touching for the best texture.
Step 4: Bake the Chicken Fingers
Pop the baking sheet into the oven and let the chicken fingers bake for 30 to 45 minutes. You’re looking for a gorgeous golden brown color and cooked-through tenderness. Baking instead of frying keeps the dish a little lighter but still crispy and delicious.
Step 5: Optional Frying for Extra Crisp
If you’re craving an even crunchier texture or want that deep-fried restaurant-style finish, you can quickly fry the baked chicken fingers in hot vegetable oil until they turn golden brown. This step is optional but highly recommended if you have the time and oil to spare.
Step 6: Thicken the Glaze
While the chicken cooks, return to your glaze mixture on the stove and bring it to a boil over medium-high heat. Reduce the heat to a simmer and let it cook down until it thickens and reduces by about half. This concentration of flavors creates the perfect sticky texture that clings to each chicken finger beautifully.
Step 7: Glaze and Garnish
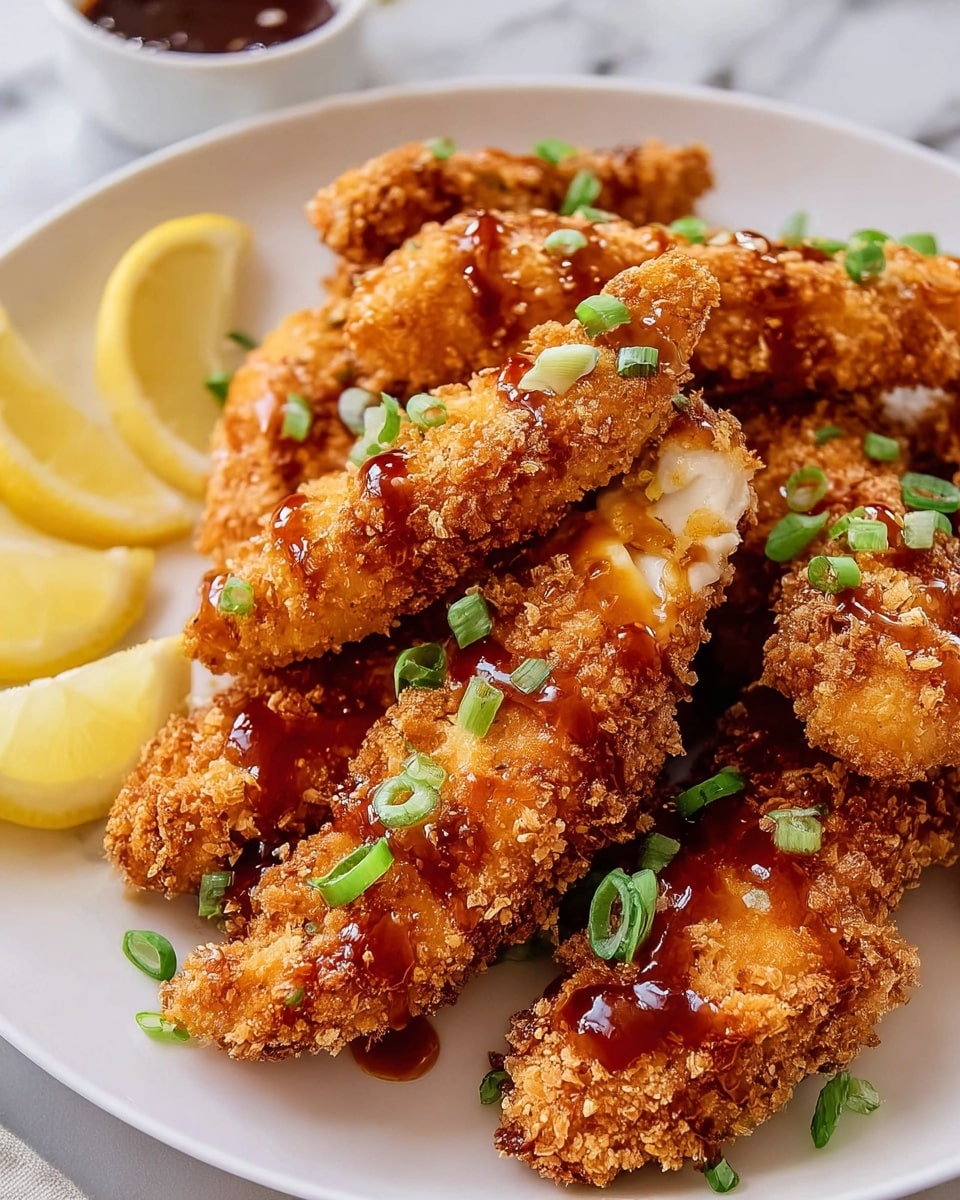
Once the chicken fingers are out of the oven (or fryer), generously drizzle them with the thick, glossy glaze. If you like a touch of fresh contrast, sprinkle some chopped green onions on top. These add a lovely pop of color and a mild oniony brightness that cuts through the sweetness.
How to Serve Asian Glazed Chicken Fingers Recipe
Garnishes
To elevate the dish visually and flavor-wise, try garnishing with finely chopped green onions or fresh cilantro for a herbal note. A sprinkle of toasted sesame seeds can add a subtle nuttiness and charming crunch that’s simply delightful.
Side Dishes
Asian Glazed Chicken Fingers pair wonderfully with simple steamed jasmine rice or coconut rice to soak up every bit of that luscious glaze. For veggies, a crisp Asian-style slaw or steamed bok choy complements the sweet and spicy flavors with fresh crunch and balance.
Creative Ways to Present
Think outside the box by serving these chicken fingers in lettuce wraps with slices of avocado and a drizzle of extra glaze. You could also skew several on bamboo sticks for bite-sized appetizers at your next party. Pair with a small bowl of extra glaze or a cooling yogurt dipping sauce to keep guests dipping and coming back for more.
Make Ahead and Storage
Storing Leftovers
Once cooled, place any leftover chicken fingers in an airtight container and refrigerate for up to 3 days. This makes for an easy, tasty lunch or quick dinner on a busy day.
Freezing
If you want to keep these longer, freeze the fully cooked chicken fingers on a baking sheet in a single layer. Once frozen solid, transfer to a freezer-safe bag or container where they will keep well for up to 2 months. Freeze the glaze separately in a small container or bag.
Reheating
To reheat and restore crispness, bake the chicken fingers in a preheated oven at 375°F (190°C) for 10-15 minutes until warmed through and crispy again. Gently reheat the glaze on the stove or in the microwave and drizzle before serving.
FAQs
Can I use chicken thighs instead of breasts?
Absolutely! Chicken thighs tend to be juicier and more forgiving during cooking. Just cut them into similar-sized strips and follow the recipe as usual for a delicious twist.
Is it necessary to bake AND fry the chicken?
Baking alone yields crispy, tender chicken fingers with less oil, making it a healthier option. Frying after baking is optional and mainly for an extra crunchy finish if you want that classic fried texture.
How spicy is the Asian Glazed Chicken Fingers Recipe?
The glaze has a gentle kick from sriracha and chili flakes but is balanced by honey and soy sauce sweetness. You can easily adjust the heat level by adding more or less sriracha and chili flakes.
Can I make the glaze ahead of time?
Yes, the glaze can be prepared and refrigerated up to 3 days in advance. Just reheat gently before drizzling over the chicken fingers to bring back its luscious stickiness.
What if I don’t have panko breadcrumbs?
Panko breadcrumbs add extra crunch, but if you don’t have them, regular breadcrumbs will work fine. For best results, toast them lightly in a dry pan before using to enhance crunch and flavor.
Final Thoughts
This Asian Glazed Chicken Fingers Recipe is one of those gems that bring people together, combining easy prep with irresistible flavor and texture. Whether you’re making it for a casual weeknight supper or a festive gathering, it promises something special that everyone will love. Dive in, get a little messy, and enjoy every finger-licking bite!
Print
Asian Glazed Chicken Fingers Recipe
- Total Time: 1 hour 15 minutes
- Yield: 6 servings 1x
Description
These Asian Glazed Chicken Fingers offer a crispy, flavorful bite coated in a sweet and spicy glaze made with honey, soy sauce, and traditional Asian spices. Perfectly baked until golden brown, they deliver a delightful combination of textures and tastes ideal for a satisfying appetizer or main dish.
Ingredients
Glaze Ingredients
- ¼ cup honey
- ½ cup low-sodium soy sauce
- 1 teaspoon sriracha sauce
- ½ teaspoon chili flakes
- ½ teaspoon Chinese five-spice powder
- ½ teaspoon garlic powder
- 1 tablespoon olive oil
- 1 tablespoon rice vinegar
- Salt and pepper, to taste
Chicken Coating and Preparation
- 2 pounds boneless, skinless chicken breasts, cut into thin strips
- 1 cup buttermilk
- 2 cups breadcrumbs (Panko recommended)
- 1–2 cups all-purpose flour, for dredging
- Salt and pepper, to taste
Garnish
- Green onions, chopped, for garnish (optional)
Instructions
- Prepare the Oven and Glaze: Preheat your oven to 400°F (200°C) and line a baking sheet with parchment paper. In a small saucepan, whisk together all the glaze ingredients—honey, low-sodium soy sauce, sriracha, chili flakes, Chinese five-spice powder, garlic powder, olive oil, rice vinegar, and season with salt and pepper. Set this mixture aside for later.
- Prepare the Chicken Strips: Cut the chicken breasts into thin strips. Place them in a bowl and pour the buttermilk over the chicken to marinate briefly. Then, arrange three shallow dishes: one with all-purpose flour seasoned with salt and pepper, another with remaining buttermilk, and the third with seasoned breadcrumbs.
- Coat the Chicken: Take each chicken strip and dredge it first in the flour mixture, then dip it into the buttermilk, and finally coat thoroughly with the breadcrumbs. Lay the coated strips evenly on the prepared baking sheet.
- Bake the Chicken: Place the baking sheet in the preheated oven and bake the chicken fingers for 30 to 45 minutes, or until they are golden brown and fully cooked through.
- Optional Frying for Extra Crispiness: If you prefer, you can fry the chicken strips in hot vegetable oil instead until they are golden brown for an extra crispy texture.
- Simmer the Glaze: While the chicken is baking, bring the prepared glaze to a boil over medium-high heat on the stovetop. Then reduce the heat and simmer until the glaze thickens and reduces by half, intensifying the flavors.
- Glaze and Serve: Once the chicken fingers are cooked, drizzle the thickened glaze evenly over them. Garnish with chopped green onions if desired, then serve warm.
Notes
- For extra crunch, use panko breadcrumbs instead of regular breadcrumbs.
- The optional frying step adds more crispiness but baking is healthier and still very tasty.
- You can adjust the sriracha and chili flakes for more or less heat, depending on your spice preference.
- If you want to make this gluten-free, substitute all-purpose flour and breadcrumbs with gluten-free versions.
- This recipe pairs well with steamed rice or a fresh green salad for a complete meal.
