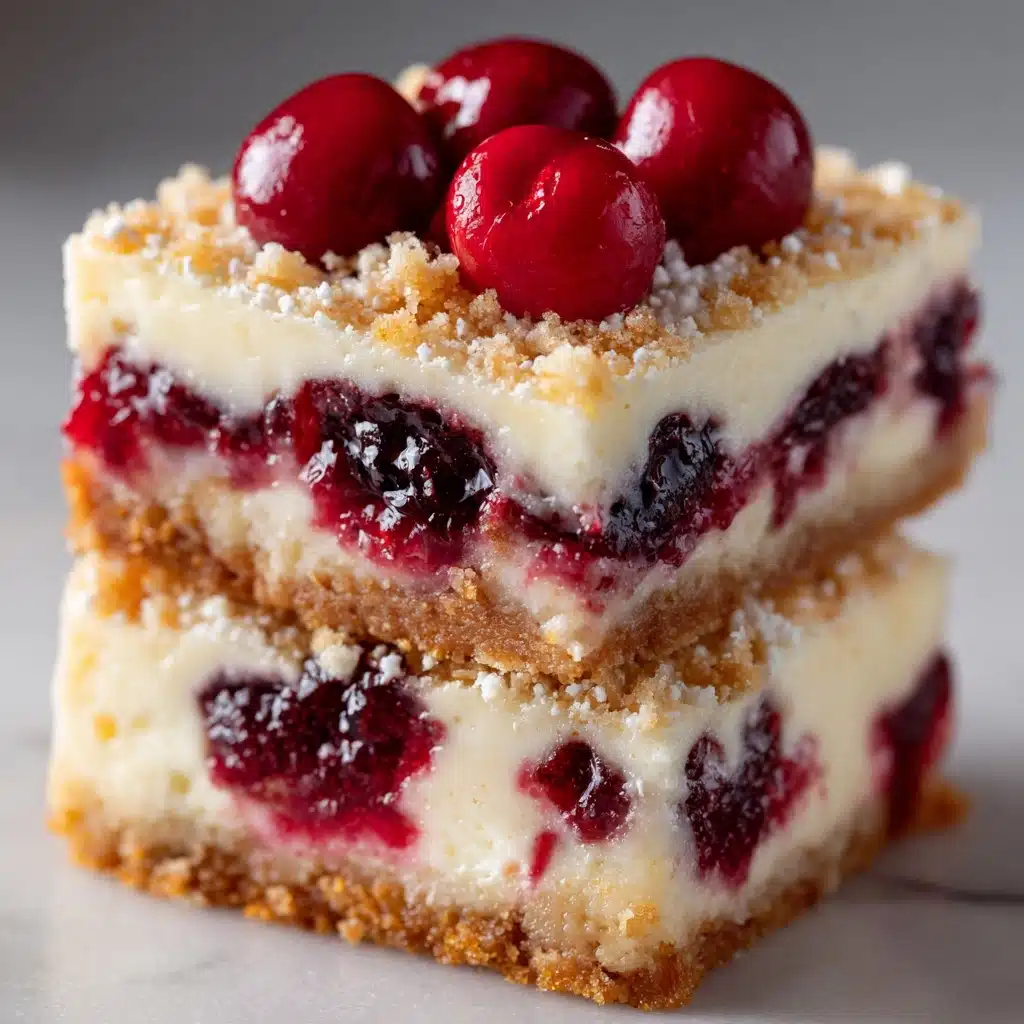
It’s simply not the holidays at my house without a big plate of Christmas Cherry Cheesecake Bars sitting front and center. These deliciously festive treats deliver everything you love about cheesecake—velvety smooth cream cheese, a buttery graham cracker crust, and a lush, fruity layer of cherry topping—without any fuss or fear of a collapsed center. Not only are they impossibly easy to make, but they look absolutely stunning on a dessert table, sprinkled with a dash of holiday cheer. Whether you’re prepping for a cookie exchange, a family get-together, or just looking to ring in the season with something sweet, these bars will quickly become your new December tradition.
Ingredients You’ll Need
You’ll be amazed how just a handful of simple, pantry-friendly ingredients can transform into such a showstopping dessert. Each one plays a crucial part—bringing something wonderful to the taste, texture, or even color that makes these Christmas Cherry Cheesecake Bars pop with every bite.
- Graham cracker crumbs: They make the perfect crunchy, buttery foundation and are so easy to work with—no rolling pins needed!
- Granulated sugar: Adds sweetness and helps both the crust and filling hold together beautifully.
- Unsalted butter (melted): Binds the crust and gives it a rich, decadent flavor.
- Cream cheese (softened): The star of any cheesecake—make sure it’s room temp for the smoothest filling.
- Eggs: Essential for setting the cheesecake into perfectly sliceable bars.
- Vanilla extract: A little goes a long way to bring out all the beautiful flavors in both crust and filling.
- Almond extract (optional): Adds a subtle, festive warmth—especially delicious when paired with cherries.
- Cherry pie filling: The glossy, ruby-red topping that shouts “holiday!” with every decadent spoonful.
- Red and green sprinkles (optional): For a playful and merry finish that makes every bar sparkle.
How to Make Christmas Cherry Cheesecake Bars
Step 1: Prep Your Pan
Start by preheating your oven to 325°F (163°C). Grab a 9×13-inch baking pan and line it with parchment paper—this makes it a breeze to lift out the finished bars. Or, if you’d rather, a light coating of butter or baking spray will do the trick. Taking the time to prep your pan ensures your bars come out clean, with crisp, photo-worthy edges.
Step 2: Make the Graham Cracker Crust
In a medium bowl, mix together the graham cracker crumbs, 1/4 cup granulated sugar, and the melted butter until every crumb glistens. Press the mixture firmly into the bottom of your pan, forming an even layer that’s packed tight. Pop the crust in the oven for 10 minutes. This not only toasts the crumbs for a deeper flavor, but ensures they’ll hold up under the luscious cheesecake filling.
Step 3: Whip Up the Cheesecake Layer
Grab a large bowl (or your favorite stand mixer) and beat the softened cream cheese with 2/3 cup of sugar until it’s creamy, smooth, and free of lumps—this step makes all the difference for that signature silky texture we love in Christmas Cherry Cheesecake Bars. Add the eggs one at a time, mixing well after each, then stir in the vanilla and almond extract. Pour this dreamy mixture over your pre-baked crust, using a spatula to smooth the top into a perfectly even canvas.
Step 4: Add Cherry Topping
Spoon the cherry pie filling evenly across the cheesecake layer. Take a moment to spread the cherries out so every single bar gets a generous, fruity crown. The bright red cherries add that festive holiday sparkle—and if you’re feeling creative, swirl them just a bit for an extra gorgeous effect!
Step 5: Bake to Perfection
Bake for 30–35 minutes, or until the center is set and doesn’t jiggle when you gently shake the pan. This gentle bake ensures your cheesecake layer is cooked through but still melt-in-your-mouth creamy. Once baked, let everything cool to room temperature. Then, for the best texture and cleanest cuts, refrigerate for at least 2 hours (overnight is even better).
Step 6: Chill, Slice, and Garnish
When you’re ready to serve, lift the bars out of the pan using the parchment handles and cut into 16 squares. If you’d like, scatter on some festive red and green sprinkles to make your Christmas Cherry Cheesecake Bars truly sparkle. Serve chilled, and watch them disappear in no time!
How to Serve Christmas Cherry Cheesecake Bars

Garnishes
A sprinkle of red and green holiday sprinkles is a classic, but don’t stop there! Try a dusting of powdered sugar, a little extra dollop of whipped cream, or even some shaved white chocolate to make each bar feel extra special and dressed up for the season.
Side Dishes
Pair these bars with a mug of steaming coffee or hot cocoa for a cozy wintertime dessert moment. If you’re serving a full lineup of holiday sweets, consider adding fresh fruit or a platter of assorted cookies to balance all that creamy richness.
Creative Ways to Present
Lay out your Christmas Cherry Cheesecake Bars on a rustic wooden board or a shimmering holiday tray, alternating with fresh mint leaves and a few loose cherries for a touch of green and red. Wrap individual bars in parchment and tie with red twine for elegant edible gifts—trust me, they’re always a hit at cookie swaps or as a sweet hostess gesture!
Make Ahead and Storage
Storing Leftovers
Keep any leftover bars in an airtight container in the fridge. They’ll stay wonderfully fresh for up to 4 days, making them ideal for prepping ahead or enjoying on those lazy post-holiday mornings with coffee.
Freezing
Want to get ahead on holiday baking? Freeze tightly wrapped bars (skip the sprinkles until serving) for up to one month. Thaw overnight in the fridge, then add your festive garnish just before setting them out.
Reheating
Christmas Cherry Cheesecake Bars are best enjoyed chilled, but if you prefer them just slightly warmer, let them sit at room temperature for 10–15 minutes before serving. No need to microwave or bake—this ensures the filling stays creamy and the crust remains crisp.
FAQs
Can I use a different fruit topping instead of cherry?
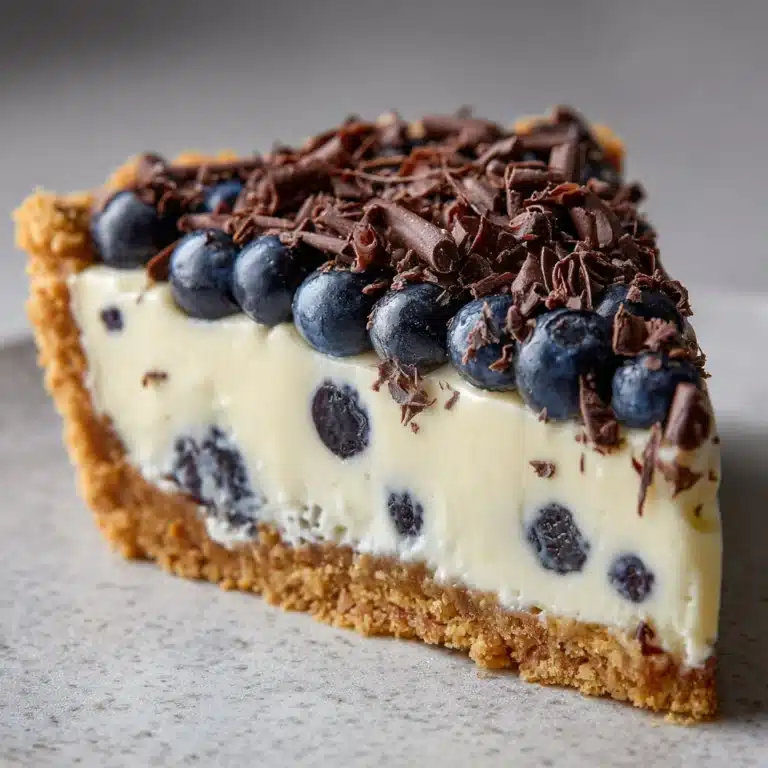
Absolutely! Blueberry, raspberry, or even a homemade cranberry compote are all fantastic alternatives if you want to get creative or cater to different tastes, but classic cherry really does capture that Christmas magic.
Do I need to let the bars cool before cutting?
Yes, patience pays off here—let the bars cool completely in the pan, then refrigerate for at least 2 hours (or overnight). This ensures clean slices and that dreamy creamy texture you expect from cheesecake bars.
Can I make Christmas Cherry Cheesecake Bars gluten-free?
Definitely! Just use your favorite gluten-free graham crackers for the crust and double-check your other ingredients. You’ll hardly notice a difference in taste or texture.
How do I avoid cracks in the cheesecake layer?
Since these bars bake at a gentle, even temperature and have cherries on top, cracks are rare and usually hidden! Make sure not to over-bake, and cool the bars gradually to ensure a perfectly smooth top.
What’s the best way to transport these bars for a party?
Chill the bars thoroughly, slice, and then layer them between sheets of parchment in an airtight container. They travel remarkably well and hold up beautifully at room temperature for several hours, so they’re perfect for sharing.
Final Thoughts
I truly hope you’ll treat yourself and your loved ones to a batch of Christmas Cherry Cheesecake Bars this holiday season. Whether you share them at a party or sneak a late-night bite just for yourself, these festive bars make every winter moment a bit sweeter. Happy baking!
Print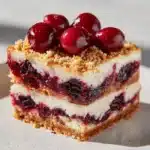
Christmas Cherry Cheesecake Bars Recipe
- Total Time: 50 minutes (plus chilling)
- Yield: 16 bars 1x
- Diet: Non-Vegetarian
Description
These Christmas Cherry Cheesecake Bars are a festive and delightful dessert that will impress your guests during the holiday season. A buttery graham cracker crust is topped with a creamy cheesecake layer and finished with a vibrant cherry pie filling.
Ingredients
Graham Cracker Crust:
- 1 1/2 cups graham cracker crumbs
- 1/4 cup granulated sugar
- 1/2 cup unsalted butter, melted
Cheesecake Filling:
- 16 ounces cream cheese, softened
- 2/3 cup granulated sugar
- 2 large eggs
- 1 teaspoon vanilla extract
- 1/2 teaspoon almond extract (optional)
Topping:
- 1 can (21 oz) cherry pie filling
- Red and green sprinkles for garnish (optional)
Instructions
- Preheat the Oven: Preheat the oven to 325°F (163°C) and prepare a 9×13-inch baking pan with parchment paper or grease.
- Make the Crust: Mix graham cracker crumbs, sugar, and melted butter. Press into the pan and bake for 10 minutes.
- Prepare the Filling: Beat cream cheese and sugar until smooth. Add eggs one at a time, then mix in extracts. Pour over crust.
- Add the Topping: Spoon cherry pie filling over the cheesecake layer.
- Bake: Bake for 30–35 minutes until set. Cool, refrigerate for at least 2 hours.
- Serve: Cut into bars, garnish with sprinkles if desired, and serve chilled.
Notes
- Use full-fat cream cheese for the best texture.
- Consider using fresh cherry compote for a homemade twist.
- Bars can be made ahead and stored in the fridge for up to 2 days.
- Prep Time: 15 minutes
- Cook Time: 35 minutes
- Category: Dessert
- Method: Baking
- Cuisine: American
Nutrition
- Serving Size: 1 bar
- Calories: 240
- Sugar: 17g
- Sodium: 180mg
- Fat: 14g
- Saturated Fat: 8g
- Unsaturated Fat: 5g
- Trans Fat: 0g
- Carbohydrates: 24g
- Fiber: 0.5g
- Protein: 3g
- Cholesterol: 55mg