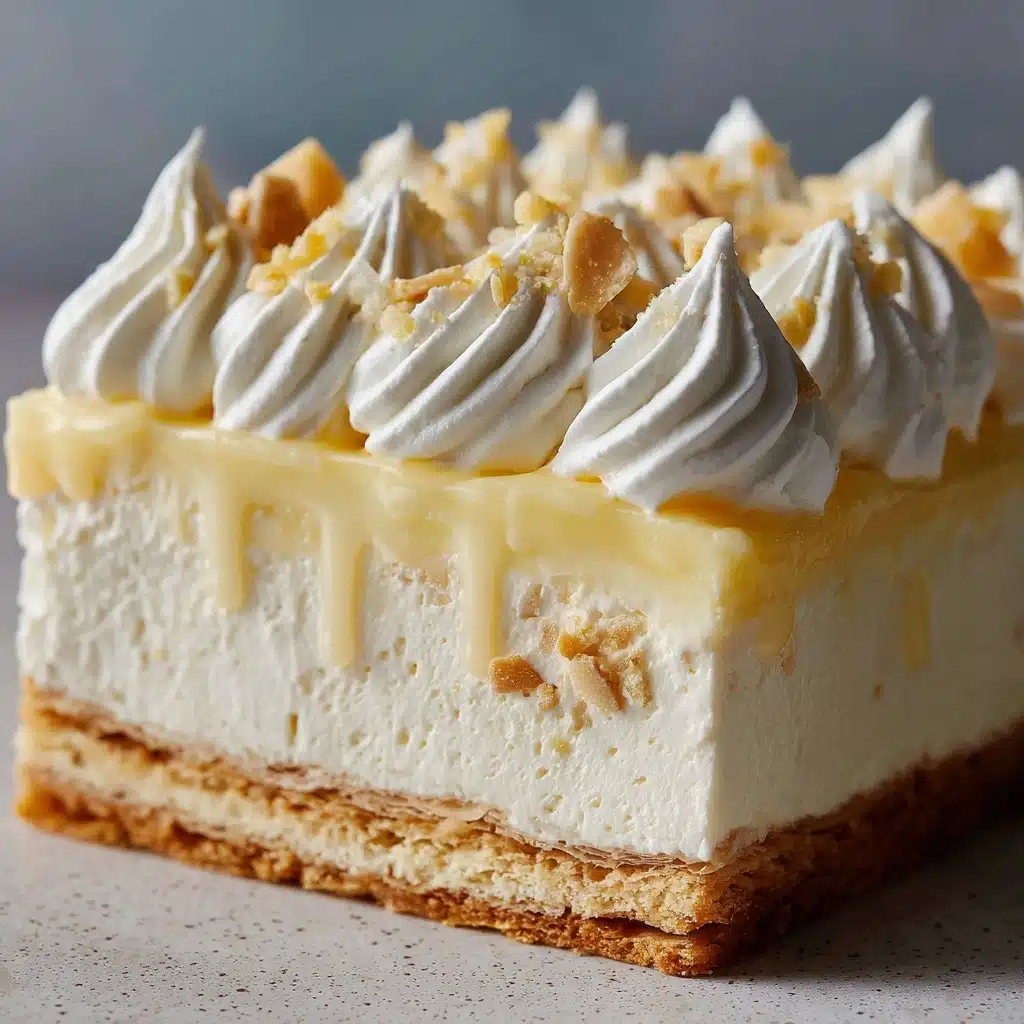
If you love cool, creamy no-bake desserts that come together in a snap, let me introduce you to your new obsession: the Cool Whip Pie Recipe. This is a classic treat that’s sweet, tart, and almost impossibly fluffy, thanks to a dreamy blend of Cool Whip, tangy lemon, and luscious condensed milk. The graham cracker crust cradles all the goodness with just the right amount of crunch. Whether you’re sharing this at a summer picnic or treating yourself on a weeknight, you’ll fall head over heels for how easy and delicious this pie is!
Ingredients You’ll Need
-
Graham Cracker Pie Crust:
- 1 pre-made graham cracker pie crust (9-inch)
Filling:
- 1 container (8 oz) Cool Whip, thawed
- 1 can (14 oz) sweetened condensed milk
- 1/2 cup lemon juice (fresh or bottled)
- 1 teaspoon vanilla extract
Optional Toppings:
- fresh fruit
- pie filling
- whipped cream
How to Make Cool Whip Pie Recipe
Step 1: Mix the Creamy Base
In a large mixing bowl, combine the sweetened condensed milk, freshly squeezed or bottled lemon juice, and vanilla extract. Whisk everything together until your mixture is perfectly smooth and you no longer see any streaks of lemon. This forms the sweet-tangy core that gives the Cool Whip Pie Recipe its signature brightness and rich flavor.
Step 2: Fold in the Cool Whip
Now it’s time for the magic! Gently fold in the entire container of thawed Cool Whip. Use a spatula and a light hand to incorporate it slowly—this is how you keep the filling ultra-fluffy and airy. Don’t rush this step; the goal is to keep all that precious volume right where it belongs, inside your pie.
Step 3: Fill the Crust
Pour the beautifully blended filling into your ready-made graham cracker crust. Use your spatula to spread it evenly, smoothing the top so it looks as dreamy as it tastes. The cool, creamy filling should nestle right into every nook and cranny, promising a perfect bite every time.
Step 4: Chill to Set
This is the hardest part—waiting! Cover your filled pie and pop it into the fridge for at least 4 hours. That chill time allows the Cool Whip Pie Recipe to fully set up, becoming sliceable (yet oh-so-creamy) and ready for whatever tasty toppings you’re planning.
Step 5: Add Toppings and Serve
Uncover your pie and top it with anything your heart desires: fresh berries, a swirl of pie filling, or an extra poof of whipped cream. Every topping adds a little extra color and flair, making your Cool Whip Pie Recipe a showstopper.
How to Serve Cool Whip Pie Recipe

Garnishes
When it comes to garnish, think vibrant and fresh! A handful of ripe strawberries, blueberries, or raspberries adds a burst of color and juicy sweetness. If you’re feeling a little more indulgent, dollops of whipped cream or even a drizzle of berry pie filling take the presentation over the top.
Side Dishes
Since the Cool Whip Pie Recipe is so refreshingly light, you can keep things simple with a crisp cup of black coffee or iced tea alongside each slice. For a fancier affair, a fruit salad or some crunchy lemon shortbread cookies are wonderful companions that echo the pie’s bright, citrusy notes.
Creative Ways to Present
Serve individual slices on chilled plates for a cool summer treat, or cut the pie into bite-size squares for an irresistible dessert buffet. You can even layer the pie filling into mini jars for a cute picnic treat, or make “pie parfaits” with crushed graham crackers and alternating luscious layers!
Make Ahead and Storage
Storing Leftovers
To keep your Cool Whip Pie Recipe fresh, cover any leftovers tightly with plastic wrap or a pie lid and store in the refrigerator. It will easily keep for up to 3 days without losing its texture or flavor. The crust may soften slightly, but the filling stays creamy and dreamy.
Freezing
Good news: This pie freezes beautifully! Wrap your entire (or partial) Cool Whip Pie Recipe in plastic wrap and then a layer of foil, or store individual slices in airtight containers. Freeze for up to one month. For a frosty summer treat, you can even serve it slightly frozen for that icebox pie experience.
Reheating
There’s no need to reheat this Cool Whip Pie Recipe—it’s meant to be served cold or lightly thawed! If you’ve frozen it, let it sit in the fridge for a few hours before serving, or at room temperature for about 20 minutes for the ideal creamy texture.
FAQs
Can I use homemade whipped cream instead of Cool Whip?
Absolutely! While Cool Whip keeps things ultra-convenient and stable, you can swap in homemade whipped cream—just whip about 2 cups of heavy cream with a little powdered sugar until stiff peaks form, and fold it in as you would the Cool Whip.
Is there a dairy-free version of the Cool Whip Pie Recipe?
Yes, you can substitute with dairy-free whipped topping and use a dairy-free sweetened condensed milk. The result is every bit as luscious and refreshing for anyone who needs a dairy-free dessert option!
Can I make this pie ahead for a party?
Definitely—this pie is a host’s best friend. Prepare it up to 24 hours in advance, keep it well chilled, and add your toppings just before serving for the freshest presentation.
What other flavors work well in the Cool Whip Pie Recipe?
Try swapping the lemon juice for lime juice, or add a splash of coconut or almond extract for a whole new vibe. You can also fold in fruit purees, zest, or crushed cookies for fun twists and flavors!
Why does the pie need to chill for 4 hours?
Chilling not only helps the filling set up so it slices beautifully, but it also allows all those flavors to meld and become even more delicious. Trust the process—your patience will be rewarded!
Final Thoughts
I hope you’re as excited as I am to dig into this Cool Whip Pie Recipe! It’s one of those effortless, crowd-pleasing desserts that you’ll want to make again and again. Whether it’s for a special gathering or just a night-in treat, this pie is sure to steal the show. Go on—give it a try and see why it’s an all-time favorite!
Print
Cool Whip Pie Recipe
- Total Time: 4 hours 10 minutes
- Yield: 8 servings 1x
- Diet: Non-Vegetarian
Description
Indulge in the light and creamy delight of this no-bake Cool Whip Pie. A luscious blend of Cool Whip, sweetened condensed milk, and zesty lemon juice in a graham cracker crust, topped with your favorite fruits or fillings. Perfect for any occasion!
Ingredients
Graham Cracker Pie Crust:
- 1 pre-made graham cracker pie crust (9-inch)
Filling:
- 1 container (8 oz) Cool Whip, thawed
- 1 can (14 oz) sweetened condensed milk
- 1/2 cup lemon juice (fresh or bottled)
- 1 teaspoon vanilla extract
Optional Toppings:
- fresh fruit
- pie filling
- whipped cream
Instructions
- Prepare Filling: In a large mixing bowl, combine sweetened condensed milk, lemon juice, and vanilla extract. Whisk until smooth.
- Blend: Gently fold in the Cool Whip until fully incorporated and fluffy.
- Fill Crust: Pour the mixture into the graham cracker crust, smooth the top.
- Chill: Cover and refrigerate for at least 4 hours until set.
- Serve: Top with fruit, pie filling, or whipped cream before serving.
Notes
- For a twist, try lime juice or flavored extracts like coconut or almond.
- Freeze for a firmer, icebox-style dessert.
- Prep Time: 10 minutes
- Cook Time: 0 minutes
- Category: Dessert
- Method: No-Bake
- Cuisine: American
Nutrition
- Serving Size: 1 slice
- Calories: 320
- Sugar: 28g
- Sodium: 160mg
- Fat: 13g
- Saturated Fat: 8g
- Unsaturated Fat: 4g
- Trans Fat: 0g
- Carbohydrates: 44g
- Fiber: 0g
- Protein: 4g
- Cholesterol: 20mg