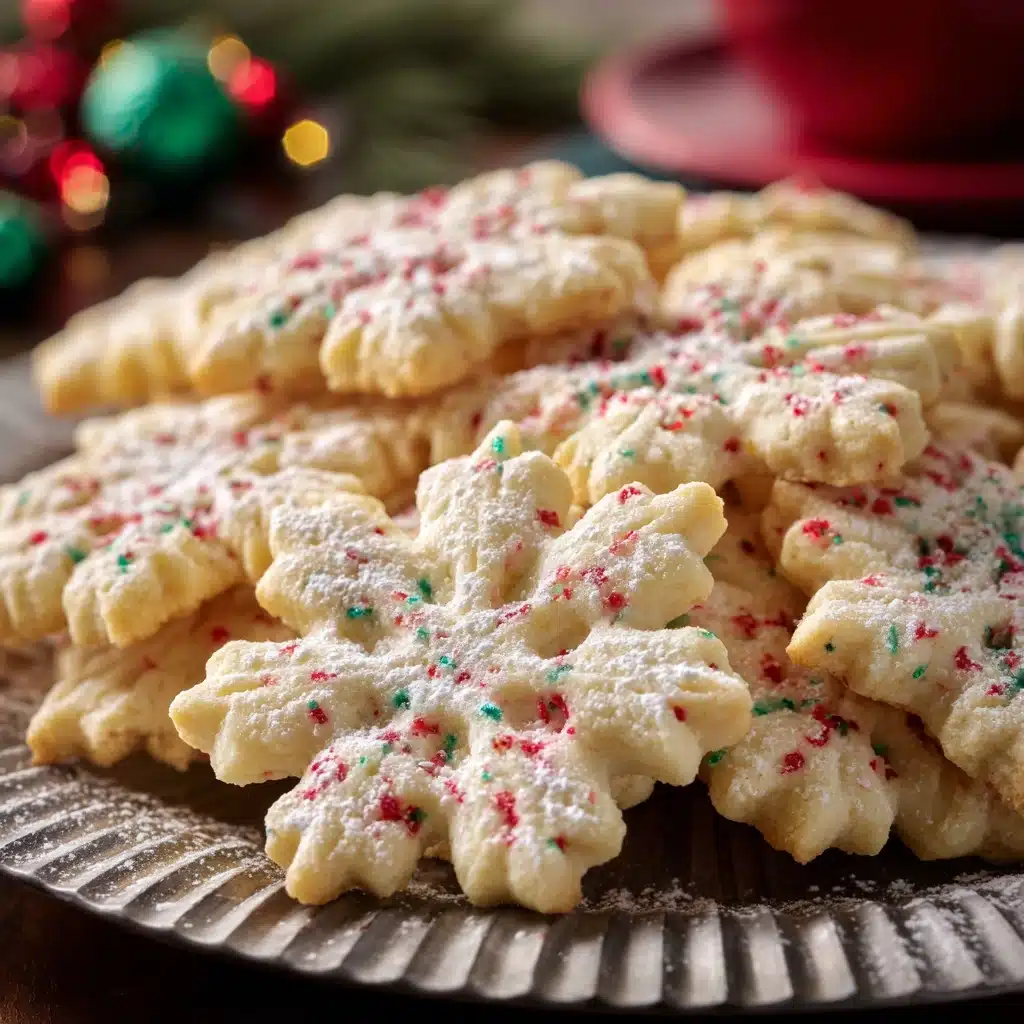
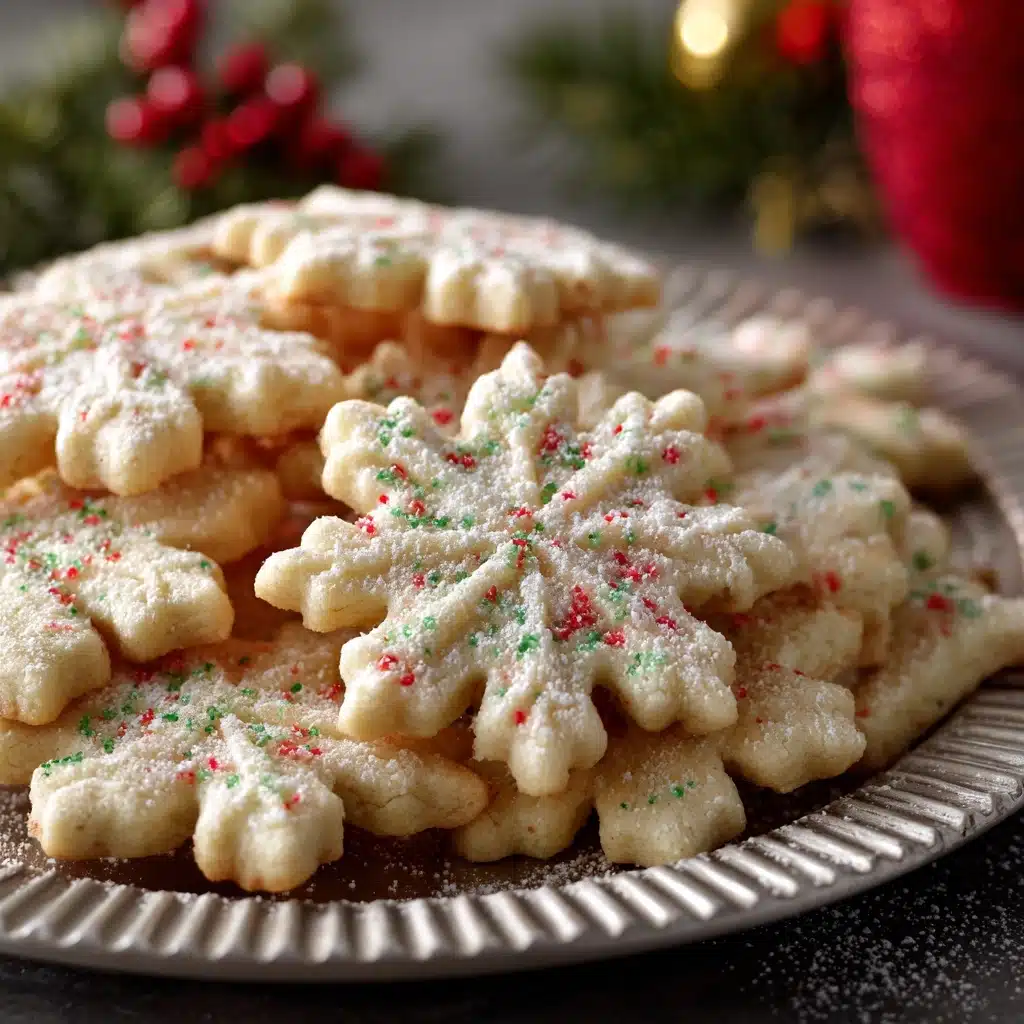
If you’re on the hunt for a treat that instantly sparks that cozy holiday spirit, look no further than Christmas Butter Cookies. Imagine buttery little bites with a delicate crumb, just the right amount of sweetness, and those charming pops of colored sprinkles. This is a cookie that manages to be both elegant on a holiday platter and wildly nostalgic, perfect for gifting, sharing, or just nibbling with a mug of cocoa. You won’t believe how quickly these become the most requested treat of your season!
Ingredients You’ll Need
The beauty of Christmas Butter Cookies lies in their simplicity: every ingredient matters and brings something special to the mix. These pantry staples work together to create the classic melt-in-your-mouth richness, delicate sweetness, and those festive touches that make this cookie a holiday favorite year after year.
- All-purpose flour: Provides structure—be sure to measure carefully so the cookies stay tender, not tough.
- Unsalted butter (softened): The star of the show! Softened butter gives these cookies their signature rich, buttery flavor and creamy texture.
- Granulated sugar: Just the right amount to sweeten without overpowering; it also helps achieve that golden, slightly crisp edge.
- Large egg: Acts as a binder and gives the cookies a bit of tenderness and lift.
- Vanilla extract: A must for adding warm, comforting aroma and depth.
- Almond extract (optional): Adds a hint of nutty, marzipan-like flavor—just a little goes a long way for festive flair!
- Salt: Brings all the flavors into sharp, delicious focus, balancing the sweetness and butteriness.
- Assorted colored sprinkles or sanding sugar: The crowning touch—choose reds, greens, golds, or even snowflake shapes to dress up your Christmas Butter Cookies.
How to Make Christmas Butter Cookies
Step 1: Cream the Butter and Sugar
Start by preheating your oven to 350°F for consistent baking from the very first batch. In a large mixing bowl, cream together the softened butter and granulated sugar until the mixture looks pale and fluffy. This step aerates the dough, helping to create cookies that are light and tender. Don’t rush it—the longer you whip, the better!
Step 2: Add Egg and Flavorings
Crack in the egg, pour in your vanilla extract, and if you like a hint of something extra, the almond extract too. Mix until everything is silky and thoroughly combined. This is where the cookies start to take on their layered, irresistible flavor.
Step 3: Add Dry Ingredients
Gradually sprinkle in the flour and salt, mixing on low just until the dough forms and pulls together into a soft mound. Take care not to over-mix at this point, since you want your Christmas Butter Cookies delicate, not dense. The dough should be smooth and workable.
Step 4: Add Color for Festiveness (Optional)
If you’re in the mood to make things extra cheerful, divide your dough into portions and knead in a few drops of food coloring for vibrant holiday hues. Swirling in red, green, or gold can make even simple shapes instantly festive!
Step 5: Shape and Decorate
Roll the dough into 1-inch balls, or load some into your favorite cookie press for classic shapes like wreaths and stars. Arrange them on a parchment-lined baking sheet about 2 inches apart. Here comes the fun part: top each cookie with a dash of colored sugar or a generous dusting of sprinkles for that signature Christmas look.
Step 6: Bake to Perfection
Pop your sheet into the oven and bake for 8–10 minutes, just until the edges barely turn golden. These cookies are best when they’re still tender in the center, so don’t let them over-bake. Let the cookies cool on the baking sheet for 5 minutes to firm up before carefully transferring them to a wire rack to finish cooling.
How to Serve Christmas Butter Cookies
Garnishes
The simplest garnish for Christmas Butter Cookies is a generous handful of festive sprinkles or sanding sugar before baking, plus an optional dusting of powdered sugar once cooled. For next-level presentation, try drizzling cooled cookies with melted white or dark chocolate, or even sandwiching a bit of raspberry jam between two cookies for a surprise center!
Side Dishes
Pair your Christmas Butter Cookies with mugs of hot cocoa, spiced cider, or strong black tea to balance the sweetness. They also sit beautifully alongside other holiday favorites like gingerbread men, peppermint bark, or even a festive fruit platter for gatherings.
Creative Ways to Present
Turn your cookies into delightful gifts by layering them in cellophane bags with ribbon, boxing them in vintage cookie tins, or stacking them in clear jars for a stunning edible centerpiece. Arrange cookies on a tiered dessert stand or string them with thin ribbon for a showstopping cookie “ornament” display—a guaranteed conversation starter!
Make Ahead and Storage
Storing Leftovers
Once your cookies are fully cooled, stash them in an airtight container at room temperature. They’ll stay fresh and buttery for up to a week—the biggest challenge is making them last that long with snackers around!
Freezing
Christmas Butter Cookies actually freeze wonderfully. Layer cooled cookies between wax paper in a freezer-safe container and stash for up to three months. Thaw at room temperature when ready to serve, and they’ll taste just as delectable as day one.
Reheating
While these cookies are lovely at room temperature, you can pop them in a 300°F oven for 2–3 minutes if you want to revive that just-baked aroma and warmth. Just be careful not to overdo it—they’ll soften up beautifully and smell irresistible.
FAQs
Can I use salted butter instead of unsalted?
You can swap in salted butter for unsalted, just remember to reduce or omit the extra salt called for in the recipe so your Christmas Butter Cookies don’t end up too salty.
How thick should I roll out the dough if I’m cutting shapes?
Aim for about 1/4 inch thick if you’re rolling and cutting shapes. Any thinner and the cookies might over-bake; much thicker, and they may not bake evenly or hold intricate designs well.
Can I make the dough ahead of time?
Absolutely! You can refrigerate the dough, tightly wrapped, for up to three days. Chilling helps flavors meld and can even improve the cookies’ shape during baking.
What if I don’t have a cookie press?
No worries—just roll the dough into balls and gently flatten them with your palm or the bottom of a glass. You can also use cookie cutters for classic or whimsical shapes.
Are Christmas Butter Cookies gluten-free?
The traditional recipe uses standard all-purpose flour, but you can experiment with a high-quality gluten-free baking blend for similar results. Keep an eye on texture and flavor, as gluten-free flours can vary quite a bit.
Final Thoughts
Nothing makes the holidays feel quite as magical as the sweet aroma of Christmas Butter Cookies wafting through the kitchen. Invite friends or family to join in the decorating, or savor a quiet moment with a batch all your own—either way, these cookies are bound to add warmth and cheer to your celebration. Don’t let another season pass without baking up a batch!
Print
Christmas Butter Cookies Recipe
- Total Time: 30 minutes
- Yield: 36 cookies 1x
- Diet: Vegetarian
Description
These Christmas Butter Cookies are a delightful holiday treat that are perfect for festive gatherings or as gifts. They are buttery, sweet, and can be decorated with colorful sprinkles to add a pop of holiday cheer.
Ingredients
Dough:
- 2 1/2 cups all-purpose flour
- 1 cup unsalted butter (softened)
- 3/4 cup granulated sugar
- 1 large egg
- 1 teaspoon vanilla extract
- 1/2 teaspoon almond extract (optional)
- 1/4 teaspoon salt
Decoration:
- Assorted colored sprinkles or sanding sugar for decorating
Instructions
- Preheat Oven: Preheat oven to 350°F.
- Cream Butter and Sugar: In a large mixing bowl, cream together butter and sugar until light and fluffy.
- Add Wet Ingredients: Beat in egg, vanilla extract, and almond extract if using.
- Mix Dry Ingredients: Gradually add flour and salt, mixing until a soft dough forms.
- Color and Shape Dough: Divide dough if desired and add food coloring to create festive colors. Roll dough into 1-inch balls or use a cookie press for shapes.
- Bake: Place cookies on a parchment-lined baking sheet about 2 inches apart. Sprinkle with colored sugar or sprinkles. Bake for 8–10 minutes or until edges are lightly golden.
- Cool: Allow to cool on the baking sheet for 5 minutes before transferring to a wire rack.
Notes
- For a richer flavor, chill the dough for 30 minutes before baking to help cookies hold their shape.
- These cookies can be glazed or dipped in chocolate after baking for variety.
- Prep Time: 20 minutes
- Cook Time: 10 minutes
- Category: Dessert
- Method: Baking
- Cuisine: American, European
Nutrition
- Serving Size: 1 cookie
- Calories: 90
- Sugar: 5 g
- Sodium: 40 mg
- Fat: 5 g
- Saturated Fat: 3 g
- Unsaturated Fat: 2 g
- Trans Fat: 0 g
- Carbohydrates: 10 g
- Fiber: 0 g
- Protein: 1 g
- Cholesterol: 20 mg