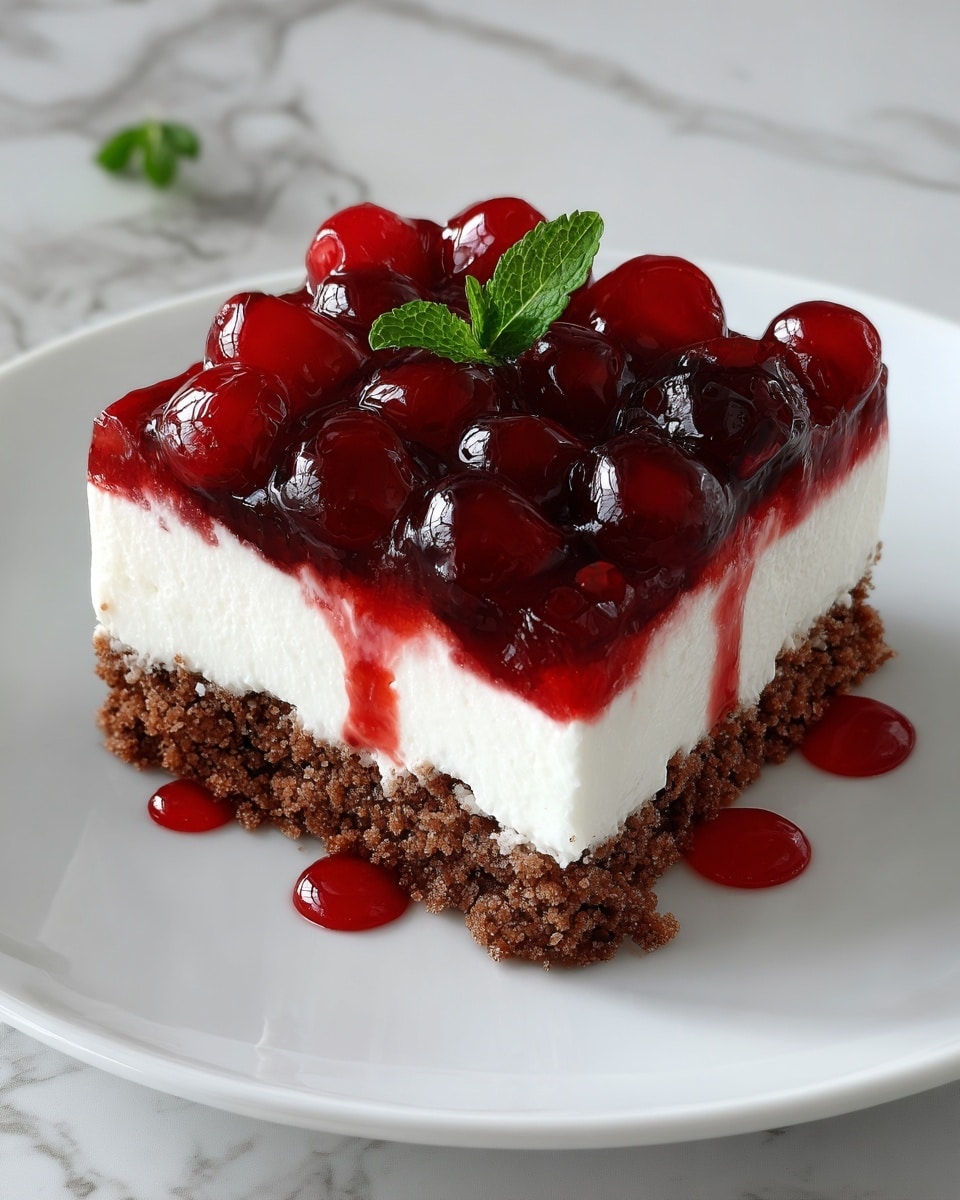
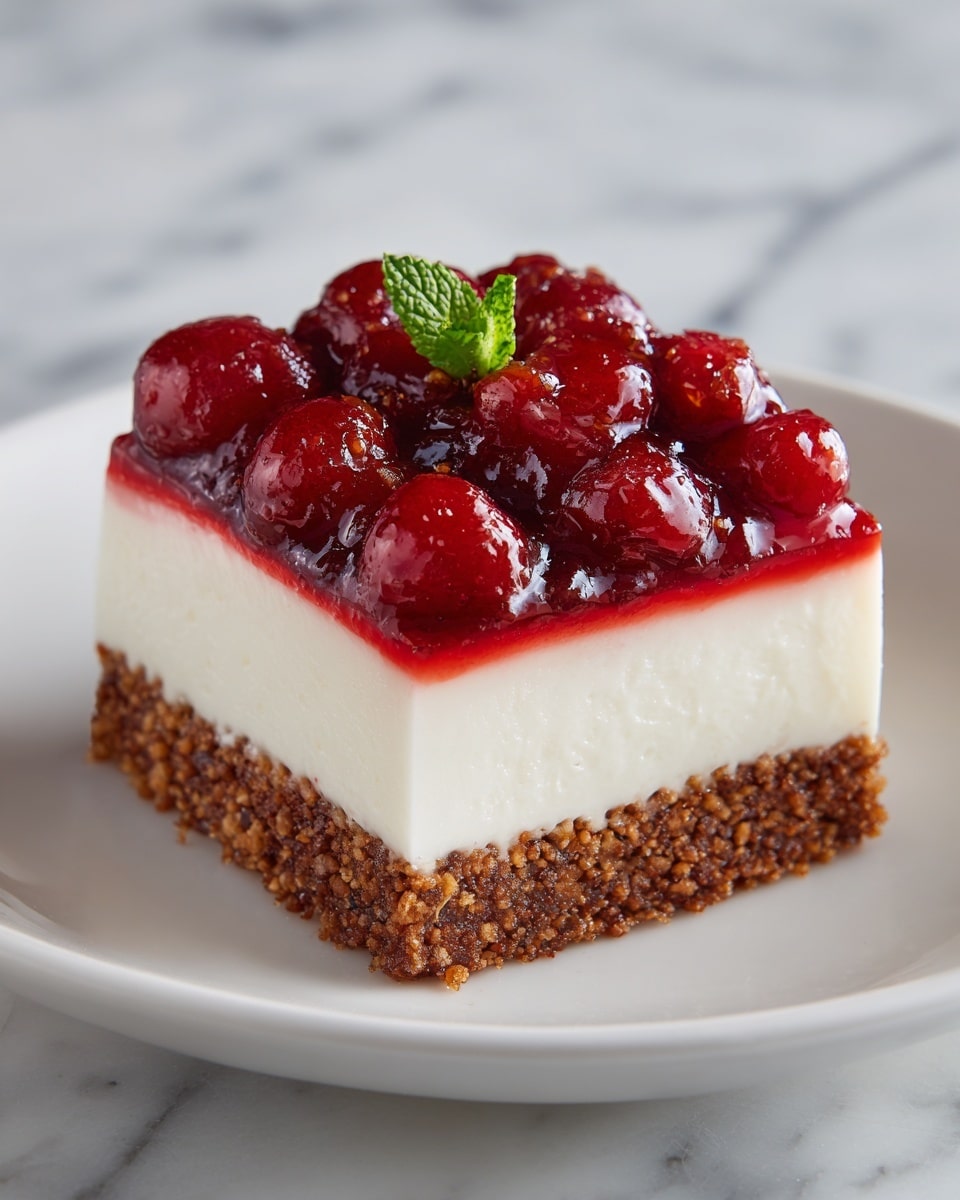
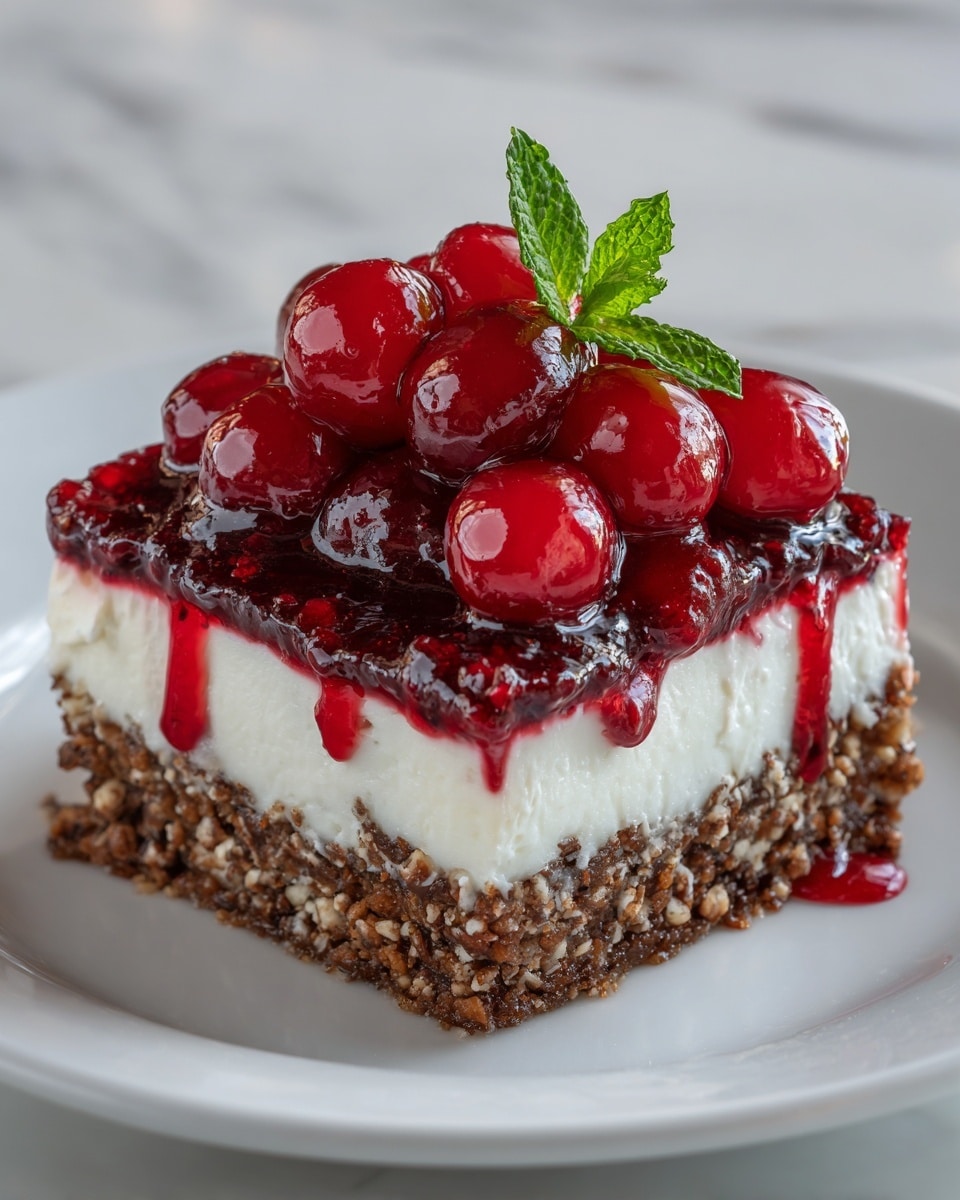
If you’re in the mood for something indulgently sweet with a perfect balance of creamy and fruity, the Cherry Cheesecake Lush Recipe is just what you need. This delightful dessert layers a buttery graham cracker crust with a luscious, smooth cheesecake filling and a vibrant cherry topping that’s bursting with flavor. Every bite offers a wonderful contrast of textures and colors, making it not only delicious but also a true crowd-pleaser for any occasion.
Ingredients You’ll Need
Gathering the right ingredients is key because each one plays a special role in this Cherry Cheesecake Lush Recipe. From the crunchy crust to the creamy center and fruity finish, these simple staples come together to create a dessert that’s extraordinary yet easy enough for any home baker.
- Graham cracker crumbs: Provides that classic crunchy crust base that’s buttery and slightly sweet.
- Granulated sugar: Adds just the right touch of sweetness to the crust without overpowering the other elements.
- Unsalted butter, melted: Binds the graham crackers together and enriches the crust with a smooth, toasted note.
- Cream cheese, softened: The star of the cheesecake filling, lending richness and that signature tangy flavor.
- Powdered sugar: Sweetens and smooths the cheesecake mixture for a velvety texture.
- Vanilla extract: Enhances flavor depth and gives a warm, comforting aroma.
- Heavy whipping cream: Whipped into the filling to add lightness and fluffiness.
- Sour cream: Adds a subtle tang and balances the sweetness perfectly.
- Cherry pie filling: Provides a bright, luscious topping that adds juicy bursts of flavor and beautiful color.
How to Make Cherry Cheesecake Lush Recipe
Step 1: Prepare the Crust
Start by combining the graham cracker crumbs and granulated sugar in a medium-sized bowl. Stir the melted butter in until the mixture feels like wet sand — this texture is key for packing it tightly. Press this mixture firmly into the bottom of a 9×13-inch baking dish to create an even, sturdy layer that will support all the creamy goodness above it.
Step 2: Make the Cheesecake Filling
Next, beat softened cream cheese and powdered sugar together in a large bowl until you achieve a smooth, creamy base. This is where the magic happens as you add vanilla extract, heavy whipping cream, and sour cream, beating continuously until the mixture becomes fluffy and light. The combination of sour cream and heavy cream makes the filling irresistibly silky and tangy, ensuring every bite melts in your mouth.
Step 3: Assemble and Chill
Now it’s time to spread your luscious cheesecake filling evenly over the prepared crust, smoothing it out with a spatula. Refrigerate this beauty for at least two hours, or ideally overnight, to let everything set firmly. This chilling step is crucial as it allows the cheesecake layer to become dense and creamy, ready for the crowning cherry topping.
Step 4: Add the Cherry Topping
Once your cheesecake layer has set perfectly, spoon the cherry pie filling gently over the top, covering it evenly. The bright red cherries not only add a gorgeous contrast but also infuse the dessert with a juicy sweetness that complements the rich cheesecake beautifully.
Step 5: Serve and Enjoy
Finally, cut your Cherry Cheesecake Lush Recipe into generous squares and serve chilled. For an added touch of elegance and texture, feel free to top each piece with a dollop of whipped cream or a sprinkle of extra graham cracker crumbs. This layered dessert is always a hit for gatherings and celebrations because it looks as fabulous as it tastes.
How to Serve Cherry Cheesecake Lush Recipe
Garnishes
Elevate your Cherry Cheesecake Lush Recipe with simple yet delightful garnishes like fresh cherries, a swirl of whipped cream, or a delicate dusting of crushed graham crackers. These little touches not only add a pop of color but also provide extra texture and a homemade feel that guests will appreciate.
Side Dishes
This dessert pairs beautifully with a cup of freshly brewed coffee or a glass of dessert wine, such as Moscato or a light Riesling. For a wholesome balance, try serving it alongside fresh fruit or a small scoop of vanilla bean ice cream to create a full dessert experience that’s irresistible.
Creative Ways to Present
Want to impress your guests with a fun twist? Layer individual servings in clear parfait glasses to showcase the distinct layers of crust, cheesecake, and cherries. Alternatively, prepare mini versions in cupcake liners for bite-sized indulgence. Presentation makes this Cherry Cheesecake Lush Recipe feel extra special and festive.
Make Ahead and Storage
Storing Leftovers
Keep your Cherry Cheesecake Lush Recipe covered tightly with plastic wrap or aluminum foil in the refrigerator for up to four days. This dessert maintains its creamy texture and fresh cherry flavor beautifully when stored properly, so it’s perfect for making ahead for parties or family dinners.
Freezing
If you want to save portions for later delights, freeze individual servings in airtight containers. Thaw overnight in the refrigerator before serving to retain that luscious texture without any sogginess. Freezing works well with this recipe thanks to its sturdy crust and rich filling.
Reheating
Since this is a chilled dessert, reheating is generally not necessary or recommended. Instead, serve it straight from the fridge for the best creamy texture and refreshing taste. If you prefer a slightly softer slice, just let it sit at room temperature for 10 to 15 minutes before digging in.
FAQs
Can I use fresh cherries instead of canned cherry pie filling?
Absolutely! Fresh cherries can be cooked down with sugar and a little lemon juice to mimic pie filling, giving you a fresher, homemade topping. Just be sure to cook them long enough to thicken so they won’t make the cheesecake soggy.
Is it possible to make this recipe gluten-free?
Yes! Simply substitute gluten-free graham cracker crumbs or use crushed gluten-free cookies for the crust. The rest of the ingredients are naturally gluten-free, making this dessert accessible without sacrificing flavor.
How long does the Cherry Cheesecake Lush Recipe take to set properly?
At least two hours in the refrigerator is required to firm up the layers, but overnight chilling is ideal. This ensures the crust is set and the cheesecake filling is nice and dense, making slicing much easier.
Can I make this dessert vegan or dairy-free?
While the traditional recipe relies on dairy, you can experiment with vegan cream cheese, dairy-free sour cream, and coconut cream. Keep in mind the texture and flavor may differ slightly, but it can still be delicious with the right substitutions.
What’s the best way to cut and serve this dessert?
Use a sharp knife dipped in hot water and wiped dry before each cut for clean, neat squares. Serving chilled is best to preserve its structure and showcase the luscious layers of this Cherry Cheesecake Lush Recipe.
Final Thoughts
If you’re looking to impress with a dessert that’s as stunning as it is scrumptious, the Cherry Cheesecake Lush Recipe is truly a winner. It’s easy to make, endlessly adaptable, and downright addictive. Give it a try the next time you want to treat yourself or your loved ones to something special—you’ll be so glad you did!
Print
Cherry Cheesecake Lush Recipe
- Total Time: 2 hours 20 minutes
- Yield: 12 servings 1x
Description
Cherry Cheesecake Lush is a no-bake, layered dessert featuring a buttery graham cracker crust topped with a creamy, fluffy cheesecake filling and finished with a generous layer of sweet cherry pie filling. Perfect for potlucks or a refreshing treat, this easy-to-make dessert requires minimal preparation and chilling time for a luscious and visually appealing dish.
Ingredients
Crust
- 1 1/2 cups graham cracker crumbs
- 1/4 cup granulated sugar
- 1/2 cup unsalted butter, melted
Cheesecake Filling
- 8 oz cream cheese, softened
- 1 cup powdered sugar
- 1 teaspoon vanilla extract
- 1/2 cup heavy whipping cream
- 1/2 cup sour cream
Topping
- 1 can (21 oz) cherry pie filling
Instructions
- Prepare the Crust: In a medium-sized bowl, combine the graham cracker crumbs and granulated sugar. Stir in the melted butter until the mixture resembles wet sand.
- Form the Crust Layer: Press the crumb mixture firmly into the bottom of a 9×13-inch baking dish to create an even and compact crust layer. Set aside.
- Make the Cheesecake Filling: In a large bowl, beat the softened cream cheese and powdered sugar together until smooth and creamy with no lumps remaining.
- Add Cream and Sour Cream: Mix in the vanilla extract, heavy whipping cream, and sour cream. Continue beating until the mixture is fully combined, light, and fluffy.
- Assemble the Cheesecake Layer: Spread the cheesecake filling evenly over the prepared graham cracker crust using a spatula, smoothing the surface for an even layer.
- Chill the Dessert: Refrigerate the dessert for at least 2 hours or overnight to allow the cheesecake layer to set and firm up properly.
- Add Cherry Topping: Once the cheesecake layer is fully set, evenly spoon the cherry pie filling over the top of the cheesecake layer to create the final topping.
- Serve: Cut the dessert into squares and serve chilled. Optionally, garnish with whipped cream or a sprinkle of additional graham cracker crumbs for an extra decorative touch.
Notes
- For best results, soften the cream cheese ahead of time to avoid lumps in the filling.
- Press the crust firmly to avoid a crumbly base when cutting and serving.
- Refrigerating overnight enhances the flavor and firmness of the cheesecake layer.
- Cherry pie filling can be substituted with other fruit pie fillings according to preference.
- This dessert is best served chilled and is not suitable for freezing due to the creamy topping.
- Prep Time: 20 minutes
- Cook Time: 0 minutes
- Category: Dessert
- Method: No-Cook
- Cuisine: American
