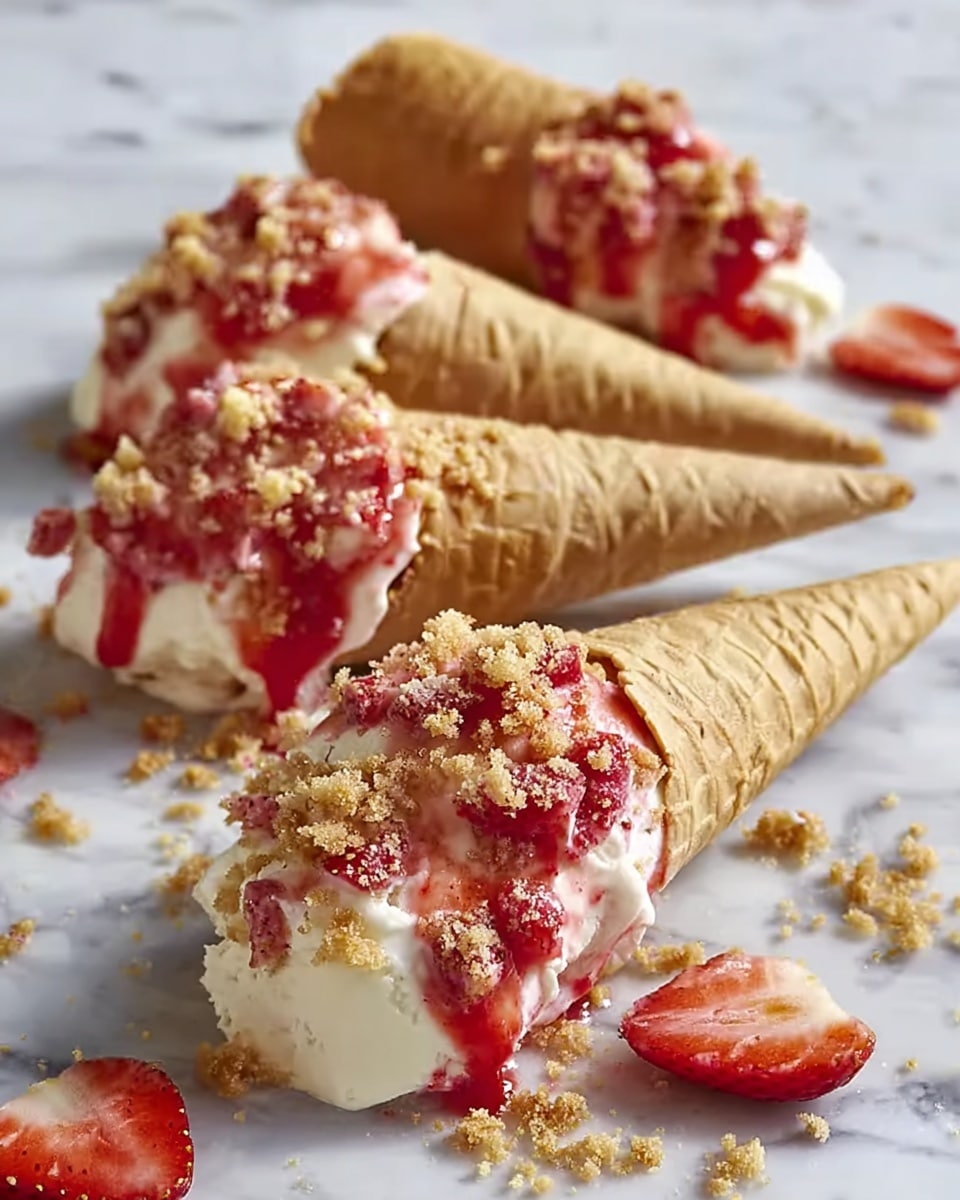
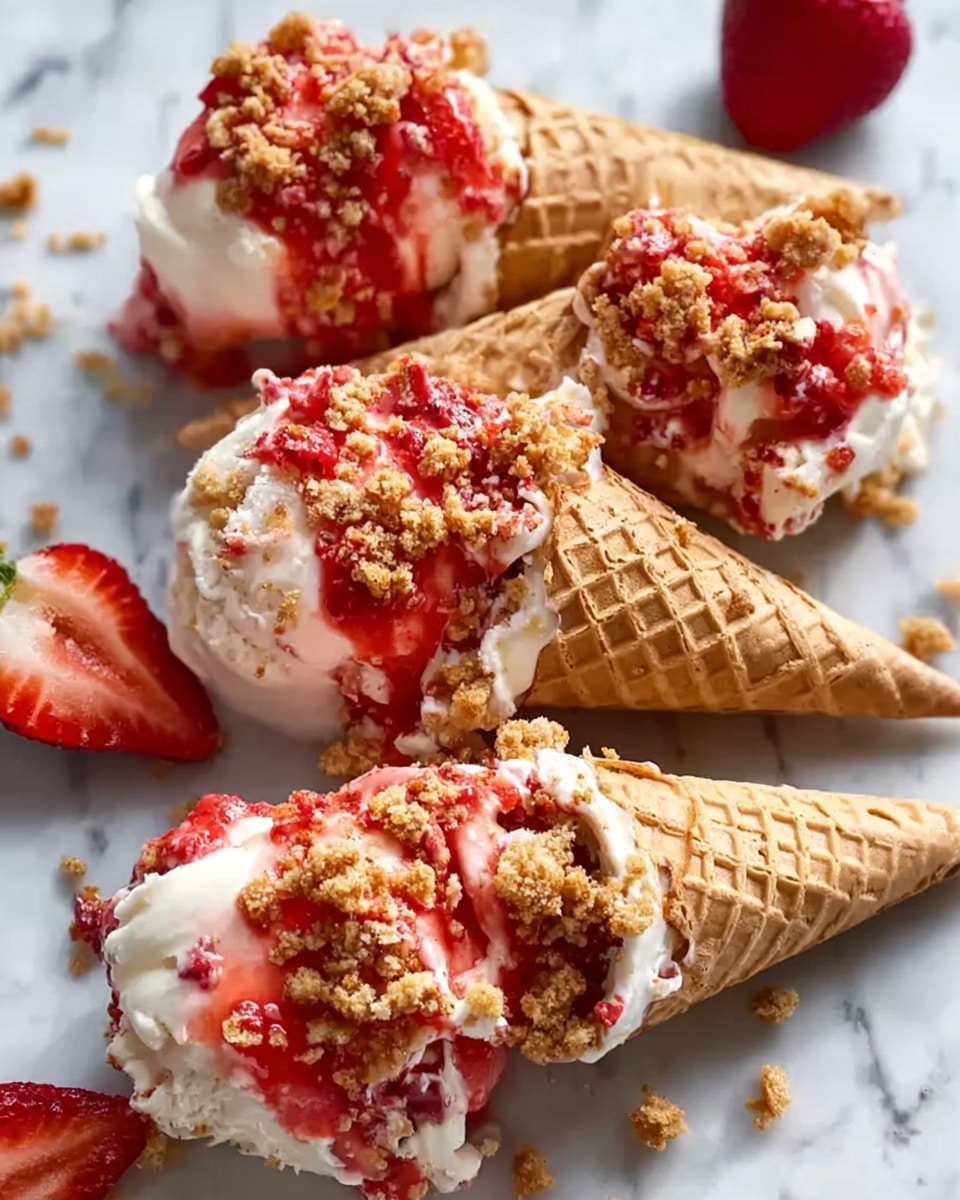
If you are looking for a delightful dessert that combines the creamy richness of cheesecake with the fun crunch of waffle cones and the burst of fresh strawberries, the Strawberry Crunch Cheesecake Cones Recipe is an absolute gem you must try. This treat is a playful twist on traditional cheesecake, transforming it into a handheld marvel that’s as beautiful as it is delicious. Perfect for summer gatherings, family celebrations, or whenever you want to add a splash of joy to your dessert table, these cones deliver layers of texture and flavor that will have everyone asking for seconds.
Ingredients You’ll Need
Though this recipe might look fancy, the ingredient list is wonderfully simple and features staples that each bring something special to the party. Every component plays a role, whether it’s the creamy body, the crunchy coating, or the fresh, fruity accents that brighten the whole experience.
- Waffle cones: The crunchy vessel that holds everything together and adds that classic cone experience.
- Full-fat cream cheese (8 oz): Provides the rich, smooth base of the cheesecake filling for indulgent flavor and texture.
- Fine granulated sugar (1/2 cup): Sweetens the filling just right without overpowering the strawberries.
- Heavy cream (1 cup): Whipped cold to add lightness and volume to the cheesecake filling.
- Pure vanilla extract (1 tsp): Enhances the overall flavor with a warm, familiar note.
- Graham cracker crumbs (1 cup): Forms the crunchy topping when combined with butter, adding texture contrast.
- Unsalted butter (4 tbsp): Melted to bind the graham cracker crumbs and create that irresistible crunch.
- Fresh strawberries: The juicy, fresh fruit gives a burst of color, flavor, and moisture to each bite.
- Red food coloring (optional): Just a drop brightens the filling and topping for a more vivid strawberry look.
- White chocolate: Melted to coat the cone tops, adding sweetness and an elegant sheen.
- Strawberry glaze: Prepared according to the linked recipe, this brings freshness and moisture that balances the richness.
- Strawberry crunch topping: Also from the linked recipe, this is the key to the signature crunch and strawberry-packed flavor.
How to Make Strawberry Crunch Cheesecake Cones Recipe
Step 1: Prepare the Strawberry Glaze
Start by making the vibrant strawberry glaze. This glaze will keep the cones moist and add that fresh, fruity zing that makes the dessert truly shine. It’s that perfect balance of sweet and tart that brightens every creamy bite.
Step 2: Create the Strawberry Crunch Topping
Next, whip up the strawberry crunch topping according to the recipe. This topping is essential because it adds the delightful crunch and extra flavor layers that make these cheesecake cones unforgettable.
Step 3: Melt the White Chocolate
Melt the white chocolate gently, keeping the heat low to avoid burning. You want it perfectly smooth for dipping the cones. If it hardens too quickly, just warm it briefly in the microwave in short bursts until it’s liquid again, ready to coat each cone beautifully.
Step 4: Dip the Cones in White Chocolate
Dip the top edges of each waffle cone into the melted white chocolate. This creates a sweet, glossy coat that not only tastes amazing but also acts as glue for the crunch topping.
Step 5: Roll Cones in Strawberry Crunch Topping
Roll the chocolate-coated section of each cone in the strawberry crunch topping right away. This step ensures an even, luscious coating that adds both texture and visual appeal, making your cones look as amazing as they taste.
Step 6: Let the Chocolate Set
Place the dipped cones on parchment paper and keep them upright while the chocolate hardens. This usually takes about 10 minutes and ensures the coating stays in place, ready to handle the creamy filling without melting away.
Step 7: Prepare the Cheesecake Filling
Once your cones are set, mix the cheesecake filling by combining the softened cream cheese, sugar, vanilla, and whipped heavy cream. For easier filling, transfer it to a piping bag or a Ziploc bag with a small corner snipped off.
Step 8: Layer the Filling
Fill each cone halfway with the cheesecake mixture. Then add a spoonful of strawberry glaze and scatter some diced fresh strawberries to build delicious flavor layers and a fun texture contrast.
Step 9: Complete Filling with More Layers
Fill the rest of the cone with more cheesecake filling, and repeat the glaze and strawberry layers on top. Be careful not to overfill to keep everything neat and easy to enjoy.
Step 10: Top with Crunch
Sprinkle more strawberry crunch topping on the filled cones. This finishing touch adds a final burst of texture and makes each cone look picture-perfect.
Step 11: Drizzle with Remaining White Chocolate
Drizzle the leftover melted white chocolate over the tops of your cones. Sprinkle with extra strawberry crunch if you like, just enough to highlight the beautiful layers without overwhelming the flavors.
Step 12: Serve or Chill
Serve your Strawberry Crunch Cheesecake Cones Recipe immediately for the best crunch and creaminess. Alternatively, refrigerate them in an airtight container for up to 3 days to retain their fresh, irresistible texture.
How to Serve Strawberry Crunch Cheesecake Cones Recipe
Garnishes
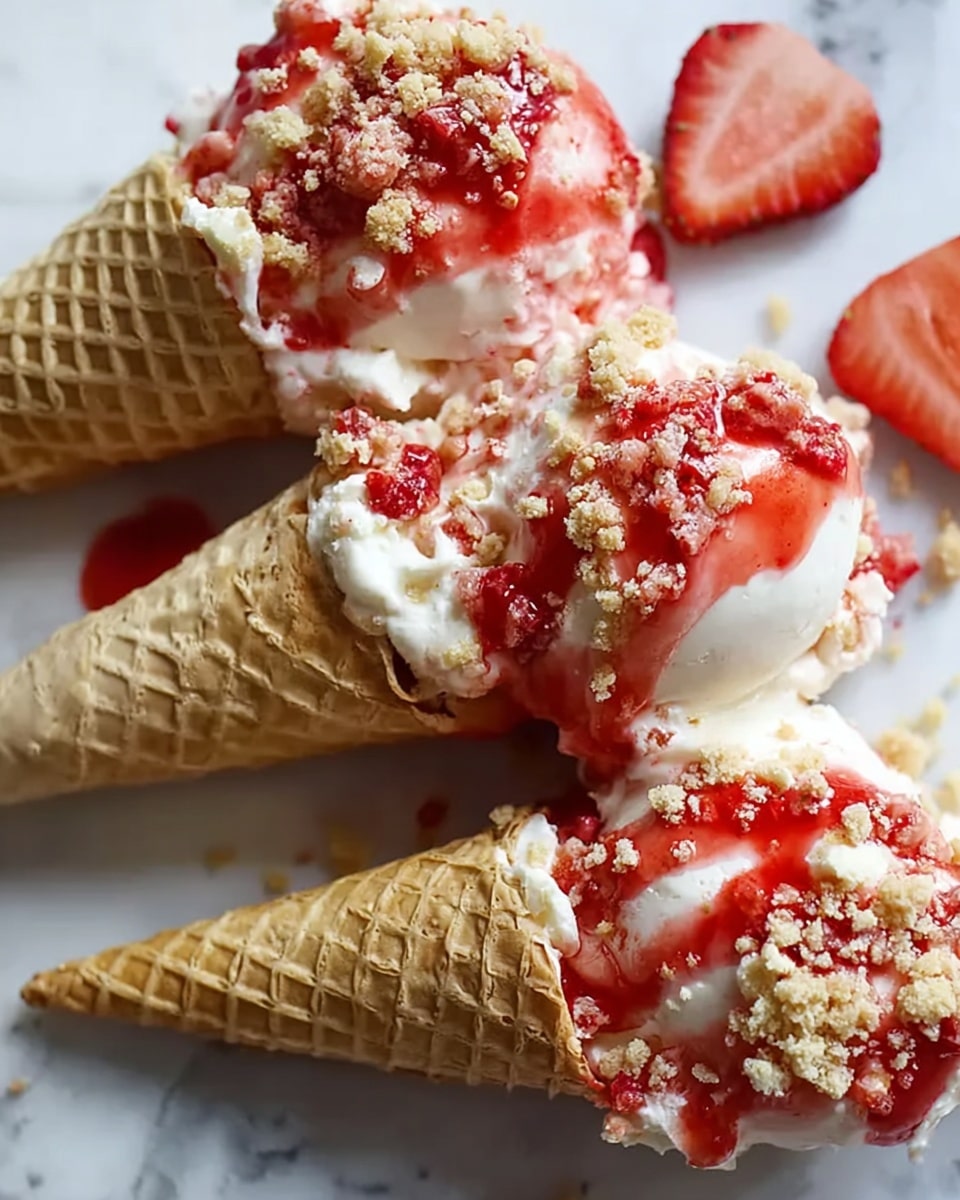
Garnish these cones with a few delicate mint leaves or additional diced strawberries for a splash of color and freshness that makes every bite pop. A light dusting of powdered sugar also lends a pretty, festive touch.
Side Dishes
Pair these cheesecake cones with a simple chilled glass of sparkling water with lemon or a fruity iced tea. If you’re serving them at a party, fresh berry salad or a scoop of sorbet are excellent complements that won’t overshadow the cones.
Creative Ways to Present
Serve the cones standing upright in a decorative cone holder or arranges in a flower pot lined with parchment for a whimsical, eye-catching display. For a party, place each cone in a colorful cupcake liner to keep them stable and add flair.
Make Ahead and Storage
Storing Leftovers
If you have leftovers, store the cheesecake cones upright in an airtight container in the refrigerator. This helps preserve the crunch and keeps the cheesecake filling fresh. They’re best enjoyed within 3 days.
Freezing
While not ideal for best texture, you can freeze these cones for up to a month. Wrap each cone individually in plastic wrap and place in a sealed container. Thaw slowly in the fridge to prevent sogginess.
Reheating
Since these are best enjoyed cold and fresh, reheating is not recommended. Instead, allow frozen cones to thaw thoroughly in the fridge before serving to maintain the creamy texture and crunch.
FAQs
Can I use low-fat cream cheese for this recipe?
While you can substitute low-fat cream cheese, the texture and flavor might not be as rich and creamy. Full-fat cream cheese provides the indulgent mouthfeel that makes these cones truly special.
Is there a vegan or dairy-free alternative?
You can experiment with vegan cream cheese and coconut cream for the filling, plus dairy-free white chocolate. However, the texture and flavor will vary from the classic recipe, so some trial and error might be needed.
How do I keep the cones from getting soggy?
Dipping the cone tops in white chocolate and glazing with strawberry glaze helps seal them and prevent sogginess. It’s important to serve them within a few days and keep them refrigerated to maintain that perfect crunch.
Can I prepare the cheesecake filling in advance?
Yes, the no-bake cheesecake filling can be made a day ahead and stored in the fridge, which actually helps the flavors meld beautifully. Just give it a quick stir before piping into the cones.
What if I don’t have graham cracker crumbs for the crunch topping?
You can substitute finely crushed digestive biscuits or vanilla wafers. They offer a similar sweetness and texture, making them a great alternative in the strawberry crunch topping.
Final Thoughts
You truly can’t go wrong with the Strawberry Crunch Cheesecake Cones Recipe. It’s not just a dessert, it’s an experience — layers of luscious cheesecake, juicy strawberries, and crisp cone crunch combine into something wonderfully memorable. Whip up a batch and share these beauties with friends or family, and watch how fast they disappear. This recipe is an invitation to savor moments of joy, one irresistible bite at a time.
Print
Strawberry Crunch Cheesecake Cones Recipe
- Total Time: 25 minutes
- Yield: 6 servings 1x
- Diet: Vegetarian
Description
These Strawberry Crunch Cheesecake Cones are a delightful no-bake dessert combining creamy cheesecake filling with fresh strawberries and a crunchy strawberry topping, all encased in a crisp waffle cone dipped in white chocolate. Perfect for individual servings, they offer layers of textures and flavors that are vibrant, refreshing, and visually appealing.
Ingredients
Cones and Coating
- 6 waffle cones
- White chocolate (amount as per package directions for melting and dipping)
- Strawberry crunch topping (prepared according to linked recipe)
Cheesecake Filling
- 8 oz (225 g) full-fat cream cheese, softened
- 1/2 cup (100 g) fine granulated sugar
- 1 cup (240 ml) heavy cream, cold, for whipping
- 1 teaspoon (5 ml) pure vanilla extract
- Red food coloring, a drop (optional, for enhancing color)
Crunch Topping Base
- 1 cup (100 g) finely crushed graham cracker crumbs
- 4 tablespoons (56 g) unsalted butter, melted slightly
Fruit and Glaze
- Fresh strawberries, diced (amount as desired for layering)
- Strawberry glaze (prepared according to linked recipe)
Instructions
- Prepare the Glaze: Make your strawberry glaze following the provided recipe. This will add fresh flavor and moisture to the cones, preventing dryness and enhancing taste.
- Create the Crunch Topping: Prepare the strawberry crunch topping as instructed in the linked recipe. This topping adds essential texture contrast and sweetness to the cones.
- Melt the Chocolate: Melt the white chocolate according to the package directions, using low heat and careful monitoring to avoid burning and maintain smoothness. If chocolate hardens too quickly, remelt it in 10-second microwave increments until fully melted and smooth.
- Dip the Cones: Dip the top portion of each waffle cone into the melted white chocolate. Gently tap off any excess chocolate to avoid mess and ensure a neat coating.
- Coat with Crunch Topping: Immediately roll the chocolate-coated cone in the strawberry crunch topping until evenly covered. A uniform coating improves both appearance and flavor consistency.
- Set the Cones: Place the dipped and coated cones upright on a parchment-lined baking sheet. Allow the chocolate to harden, generally about 10 minutes, keeping cones apart to prevent sticking.
- Prepare the Filling: Scoop the no-bake cheesecake filling into a piping bag or a Ziploc bag with the corner snipped for easier and cleaner filling of the cones.
- Layer the Filling: Fill each cone halfway with cheesecake filling. Add a small spoonful of strawberry glaze and a few diced fresh strawberries on top to build layers of flavor and texture.
- Complete the Filling: Fill the remainder of each cone with cheesecake filling, repeating the glaze and strawberry layer. Be careful not to overfill to avoid overflow and mess.
- Top with Crunch: Sprinkle additional strawberry crunch topping on the tops of the filled cones for decoration and added texture.
- Drizzle with Chocolate: Using leftover melted white chocolate, lightly drizzle over the cone tops and add extra strawberry crunch topping to enhance appearance and flavor without overpowering.
- Serve or Chill: Serve immediately or refrigerate in an airtight container until ready to serve. These cones are best fresh but can be stored up to 3 days in the fridge to retain crunchiness.
Notes
- Use full-fat cream cheese and heavy cream for the creamiest and richest cheesecake filling.
- If desired, add a drop of red food coloring to the filling for a pinker hue matching the strawberry theme.
- Ensure the cones are fully cooled and dry before dipping in chocolate to avoid melting or sogginess.
- Keep cones upright while setting the chocolate to maintain shape and prevent sticking.
- Store filled cones in the refrigerator and consume within 3 days for best texture and flavor.
- For easier filling, chilling the cheesecake mixture slightly before piping can help maintain shape.
- Prep Time: 15 minutes
- Cook Time: 10 minutes (setting time for chocolate)
- Category: Dessert
- Method: No-Cook
- Cuisine: American
